Can cuttings be rooted? You can grow an apple tree from cuttings in different ways.
Hello, dear readers of the site!
Cut, starting in autumn, after leaf fall, and until spring, until the moment the buds awaken, healthy annual matured branches - these will be lignified cuttings.
Determine the length at your discretion, but, as they say, God loves a trinity, so the site recommends leaving three kidneys optimally. You can leave up to ten, but the more buds, the more moisture the cutting will need in order not to dry out, and this is an extra load.
A straight (perpendicular) cut is made on top of the cutting. This will give the minimum area of the wound. And from below we make a cut at an angle.
If we immediately root, then we make two shallow () cuts in the bark on the sides of the cutting.
It is clear that this is done in order to provoke the maximum amount of cambium to build roots.
If there is a kidney close to the incisions, from future roots, it is advisable to remove it with a sharp knife or gently with the nails of the thumb and forefinger. Because of such a close location to the soil, it is still doomed, and forces and moisture will be spent on it the most.
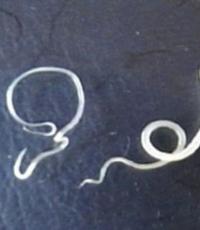
When harvesting cuttings, pay attention to the color of the wood. If it is yellowish, then the stalk is sick, if the wood of the stalk is glassy and darkens quickly, the stalk is frozen.
The wood of a healthy cutting will be elastic, whitish-green in color.
You can guess that lignified cuttings, when properly stored, are very durable - up to three years.
You can store them in a dark, cold place, for example, like food in the refrigerator, or like potatoes in the basement (remember what awakens: heat and light, when we store cuttings, we do the opposite).
Before you start rooting lignified cuttings, you can reanimate them a little by lowering them into a jar with a little water and covering it with a lid for about a week.
while not overdoing it.
First, never put the whole cutting into the water for more than a day. At room temperature, the cutting immediately wakes up and the cambium cells require oxygen. And your stalk, completely immersed in water, simply suffocates and dies.
Secondly, do not allow the development of the kidneys before the roots appear. This is the main rooting error, which always leads to the death of the cutting. This happens because of the heat in which the kidneys, developing, immediately waste all their strength and internal supply of nutrient moisture. And there is nowhere else to take it, because there are no roots yet. The stalk is dying. Therefore, it is necessary to make sure that
Roots developed first
and kidneys later.
Again, we recall the conditions under which the cambium is activated: heat or cold. So it turns out that the roots should be warm, and the kidneys in the cold.
Such conditions for the cutting can be created both at home and on the street. One way or another, you need to start by preparing the cutting for rooting.
Steps for preparing lignified cuttings:
- Immediately before rooting, we update the oblique cut at the bottom of the cutting and make two cuts in the bark to the cambium along the sides of the cutting, approximately 3-4 cm long.
- We remove the lowest kidney, if there are a lot of kidneys on the handle (up to ten pieces), then we remove the three lower kidneys.
- If you are working with a large number of cuttings, and even from different trees, then be sure to hang tags on your wards. It now seems that it is impossible to forget where which stalk grows. But believe me, everything is forgotten very quickly.
- For insurance, cuttings can be dipped in a solution of root growth stimulants (for how much? See the instructions for using the drug you bought).
For example, prepare a root growth stimulant you can do it yourself by mixing water (5 parts), clay (3 parts) and bile (1 part) of any animal. You can store it in the refrigerator. But with strict observance of the cambium rule (top in the cold, bottom in the heat), all these tricks with all sorts of stimulants and chemical fertilizers will be an extra cost of effort and money.
Rooting lignified cuttings indoors.
If you decide to root the cuttings at home indoors, then you need to make a wooden box 10 centimeters high with your own hands.
The width and length depends on the number of wood cuttings. It is necessary to provide 10-15 cm of free space for each cutting.
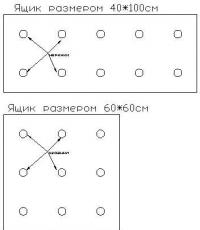
From the available boards of different lengths, you need to make a box with the least waste. For example, in a box with a size of 40*100 cm, a maximum of 10 cuttings can be placed, and in a box of 60*60 cm - 9 pieces. (see picture).
 So think about what optimal size you need, based on the size of the available boards.
We prepare the working soil for our cuttings from rotten straw or sawdust and earth (you can buy earth for indoor flowers) in a ratio of 3: 1, respectively (3 parts of straw, 1 part of earth).
Woody cuttings need oxygen to form roots, so don't overdo it with soil. The mixture should be loose so that air can easily penetrate into it.
The roots of the cuttings after rooting remain very tender and brittle. Therefore, there are two options for planting lignified cuttings.
 The first option - all the cuttings are planted in turn in one box, then, after rooting, they will need to be dug very carefully so as not to damage the roots.
And the second is to plant the cuttings also in one box, but after placing each in a separate bag. With this option, you can buy disposable bags with a size, as you remember, at least 10 * 10cm. Use scissors to cut off the bottom of each bag.
Now cover the bottom of the box with polyethylene, with the expectation that all planted cuttings will need to be covered from above, wrapped. Put a wick (a piece of cotton fabric) on the film. We need it for capillary watering of cuttings.
Cover with a 3-5 cm layer of previously prepared earthen mixture. Holding the bags so that the earth does not wake up through the cut-off bottom, fill each with earth.
The lesson may be laborious, but there will be no problems during transplantation.
We stick a lignified cutting into each bag to a depth of 1 cm more than the side cuts made (the side cuts, as you remember, are 3-4 cm long). If you do not want to get a twisted tree in the future, stick the cutting strictly vertically.
We try on the left part of the polyethylene laid on the bottom from above and mark the places of the cuttings. We make small (according to the diameter of the cutting and so as not to damage the kidney) holes for each cutting and carefully cover our entire plantation.
Roots should start growing in ten days. Then we lower our wick into a vessel with water - cord watering will provide the necessary amount of moisture, just make sure that there is more than half of the water in the vessel.
In the first variant, the same operations are performed, but one large package filled with earth can be immediately placed in the box, for the entire box. We do not need to try on the position of the cuttings. They are simply stuck into this bag with earth, taking into account 10 * 10 cm of free area for each cutting.
Now you need to create conditions when the bottom of the box is warm, and the top is cold.
But here no advice will help, only your personal experience, since you can have box boards of different thicknesses, even different voltages of electricity in the network, and, accordingly, different heat dissipation of the light bulb. Therefore, the distance to the light bulb will be different for everyone.
The main thing to remember:
You can not overheat the soil, otherwise all the cuttings will rot.
When the cuttings begin to grow, and there are still frosts on the street and it is too early to plant in open ground, then cut off the new shoots, leaving three to five lower leaves. This will make it possible to slow down the development of the shoot for several weeks, and also in the future to get two shoots and make it easier to form a crown.
In addition, in a vessel with water, which through the wick provides us with watering the cuttings, add half the dose of complex fertilizer.
When it became warm outside, the box can be taken out into the garden. Look at the weather, but usually watering can already be stopped.
In order not to damage the young tender roots, do not transplant the cuttings until autumn, and if you decide, then proceed with extreme caution, do not tear off the roots.
It is precisely at the time of transplanting into open ground that it is much easier to work with cuttings rooted in separate bags. We just tear the bag and cuttings together with a clod of earth, plant them in the ground.
Rooting lignified cuttings on the street.
Now how to proceed if it is necessary to root lignified cuttings on the street.
By and large, the rooting technology is the same. But there are, of course, differences.
First, it is night frosts and the afternoon sun. Therefore, the site is advised to cover the bed not with a film, but with a special covering material, for example, lutrasil, agril.
 The soil is prepared in the same way as when rooting in a box at home.
We mix the earth with sawdust, but sprinkle a layer of sand up to 10 centimeters on top. It will serve us in the fight against weeds, provide control from waterlogging, and also give enough air to the cuttings.
I also recommend laying a hebash strip, although in spring there is enough moisture in the ground, but suddenly it will not be enough. Then you can dig a jar of water next to the bed and lower a strip of wick into it. It is also possible, with the help of a wick, when the growth of the shoots begins, to feed the sprouted woody cuttings with fertilizers, for example, bird droppings in the proportion of 1 part of the droppings to 40 parts of water.
We cover the bed with prepared material from above, but not too tightly, let some air remain for the cuttings and press it with a load so that it does not blow away with the wind.
We stick the prepared cuttings, after cutting small holes. We leave the distance more than the box, because nothing limits us here - 15 centimeters.
The original way of rooting cuttings: bury potatoes in the ground and stick a cutting into it. Determine the depth so that three buds are in the ground, and three buds are left on top. The potato provides the stalk, for the entire time of root growth, with the necessary amount of moisture and, in addition, contains a huge amount of natural growth stimulants.
Try, experiment, remember the main rule:
the bottom is warm and the top is cold and provide airflow.
And everything will take root in you, the chances of this are very high. As a last resort, if nothing happened (this happens only when you completely forget about your cuttings), do not give up, there is a lot of time ahead before winter and you can try throughout the summer.
Thank you for your attention, all the best!
CherryLink plugin not foundMost houseplants can be propagated vegetatively - cuttings, layering, babies or division of an adult plant. At first glance, everything is simple, cut off the stalk, stuck it in the ground and wait for it to take root. In fact, such a focus is not always obtained and not for everyone. This job requires experience and skill.
In some people, everything planted grows and prospers, they are called "green hands" in England. Most of us sometimes manage to root a cutting and grow a plant from it, but more often the planting material rots or dries. What you need to know about rooting cuttings in order to propagate your favorite indoor flowers without any problems?
What should be done
Before proceeding with the preparation of cuttings and their rooting, it is important to decide on such issues:
- Find out what kind of indoor plant it is, whether it can be propagated by cuttings and read tips on how to do this specifically for this species;
- Correctly choose and cut off the cutting;
- Prepare dishes for rooting and soil suitable for this plant;
- Treat with a root growth stimulator, if necessary;
- Plant a cutting and properly care for it.
Some houseplants take root easily and quickly. There are no problems with rooting, zonal,. Large-flowered pelargoniums are more capricious. Almost always successfully propagated by cuttings and. and hard to root. If there is no experience, then it is better to practice on the most non-capricious and easily rooted home flowers.
How to properly cut cuttings.

Rooting in water.
The easiest way to propagate house plants is to cut off a branch, put it in water and wait for the roots to appear. But not all plant species develop roots under such conditions. Many simply rot after a while. Balsam, zonal pelargonium, tradescantia, coleus are usually propagated in water.
What to root? In any small glass or plastic container. In a glass, for example. It is noteworthy that roots appear faster in dark glassware. The cuttings are placed so that the lower part is immersed shallowly. For the formation of roots, the presence of oxygen is necessary, they are formed at the border of water and air. The water level in the glass should be such that the ends of the cuttings are in the water, but most of them are above the water level.
What water to use? Ordinary, from the tap. Some advise taking only boiled, it does not contain microbes, but in fact they are brought there as soon as the stalk is placed in it. A plant cannot be disinfected without killing it. In addition, in the ordinary air of an apartment there are more than enough various microorganisms. Melt water is useful, it does not contain salts and is effective for rooting.
Do I need to change the water in a vessel with cuttings? No, you should not change the water under the cuttings, but you only need to top up if necessary. Often they die after changing the water. Probably, some kind of stable environment is formed in the glass from the waste products of the plant, which promotes the growth of roots. Saintpaulia leaves, passionflower cuttings, which have already given roots, sometimes die after a change of water. Place an activated charcoal tablet in the water to keep putrefaction at bay.
How many cuttings can be placed in one glass? A little, 1 or 2. The more capricious the plant, the less. In a large mass, the cuttings usually all die. It is worth starting to rot one, as this process will affect all the others.
Rooting in the ground
Some types of plants do not give roots in water. They can stand in it for a month and not let out a single root, while in the ground they will appear in a week. The general rule is that plants from swamps and tropical rainforests are easy to root in water, species from arid areas are best planted in the ground.
soil for rooting
What soil to use for rooting cuttings? Loose, able to retain moisture well, with neutral acidity. For most crops, a simple mixture is most often used: peat in half with coarse sand. Or another inert soil that is not prone to decay. Perlite and vermiculite, coconut fiber can be added to peat. Sphagnum moss is useful, it has disinfectant properties and retains water well. Too loose soil dries quickly.
soil sterility. The soil for rooting cuttings of indoor plants should not contain fungal infections and insect pests. Many flower lovers steam garden soil, roast or freeze it. It is safest to buy ready-made soil in garden centers and add roasted sand to it. This purchased land is treated with fungicides and insecticides, which reliably protects the plants for a while.
Soil acidity. The acid reaction of the soil affects rooting. Usually they take earth with neutral acidity in the store. Most types of houseplants take root best in it. Hydrangeas need acidic soil, their cuttings root most effectively in soil with a slightly acidic reaction. The general rule for most plants is that the acidity of the soil for rooting should be close to that required for an adult plant of this species, but a little closer to neutral.
Rooting utensils
Disposable plastic cups are well suited for rooting cuttings. If one cutting rots, then the rot will not be transferred to other cuttings. Through the transparent walls you can see the emerging roots. Be sure to make a drainage hole in the bottom of the glass. At the bottom for free flow of excess water, it is advisable to put a little perlite or pieces of foam.
The downside of the cups is their small volume. If you missed a glass when watering, then the cutting may dry out.
Convenient for rooting a large number of cuttings are ordinary seedling boxes or special pallets (cassettes, trays) with cells. In the boxes, moisture is distributed more evenly, the cuttings are more compact and easier to care for.
For small cuttings, plastic food containers with a transparent lid are considered the most convenient option. They are quite rigid, the lid is easy to open when airing, it is easy to make drainage holes in them.
When choosing dishes for rooting, they are guided by the following rules:
- If the plant does not tolerate a transplant, take cups;
- If there are a lot of cuttings, their survival rate is low - they choose boxes or pallets.
Citrus cuttings, myrtle, oleander are usually planted in boxes. The crowns of these plants need shaping and pruning, after which there are many branches that are quite suitable for cuttings. Not all of them will take root, but some of them will take root.
How to plant a cutting
The question seems simple. At first sight. In some plants, roots grow along the entire length of the stem buried in the soil. The deeper you plant, the more roots you will get. In others, they appear only from a thickening at the cut site, and new shoots will grow from there. This place should not be very deep from the soil surface.
The universal way is to plant the cuttings not strictly vertically, but obliquely, approximately at an angle of 45 degrees. Then the lower end of the cutting is not deep, and a fairly large part of the shoot is in contact with the soil.
We wrap, cut leaves, bend and etiolate shoots of valuable crops together with FORUMHOUSE participants.
Seedlings of good varieties are quite expensive, so gardeners often share cuttings with each other. Green cuttings are perhaps the best method of vegetative propagation of plants. Based on the experience of FORUMHOUSE participants, we will tell you how to properly cut cuttings and what to do so that they take root easily and quickly.
- Which crop cuttings root easily?
- How to propagate plants with green cuttings.
- How to cut green cuttings.
- What should be the green cutting.
- Leafy green cuttings.
- Techniques that improve the rooting of the cuttings.
Which cuttings root easily
Green cuttings of perennials and herbaceous shrubs take root best of all, plants of tree species, especially conifers, are worse.

Here are plants that are literally made for cuttings:
- phloxes;
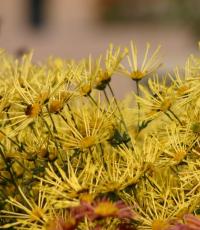
- chrysanthemums;
- grapes and almost all creepers;
- action;
- spirea;
- vesicle;
- weigela;
- dogwood;
- currant;
- forsythia;
- mock orange;
- viburnum;
- hydrangea;
- all kinds of honeysuckle;
- some types of lilac;
- actinidia;
- small-leaved roses.
Green cuttings: technique
The green cutting is the part of the stem with the leaves. It is more correct to cut them from young plants, if you want to propagate the old one, then he will have to do a rejuvenating pruning. The best cuttings are obtained from last year's growths. It is not recommended to take drag shoots for cuttings, they take root poorly.

Sodmaster Agronomist, FORUMHOUSE member
Green cuttings are planted for rooting either in a greenhouse equipped with "artificial fog" or in a "cutting plant".
An ordinary glass jar can be a full-fledged stalk, you just need to cover it with a stalk planted in the ground on top.
Each culture has its own timing of cuttings. So, for example, agronomists recommend cuttings at the beginning of summer, because grassy, young cuttings take root much better, and currants can also be cut in August, using semi-lignified cuttings.
Member of our portal Irena For many years, he has been successfully cutting plants using this method:
- Cuts the cuttings with a budding knife.
- Immediately lowers them into a prepared jar with water and a drop of Epin.
- Under the same bush from which the cutting was taken, loosens the ground.
- He takes out the cuttings one by one from the jar, dips the lower end in Konevin.
- Sticks the cutting into the ground, covers it with a glass jar or plastic bottle.
Irena FORUMHOUSE Member
I cut the cuttings with 2-3 internodes, the lower cut is oblique, the upper is straight. It is better to transplant to a permanent place in the spring of next year, but some plants can be already in September.
How to cut green cuttings
Our task is to achieve successful rooting of cuttings, and we will greatly facilitate it for ourselves if we adhere to a number of rules. So, if you cut the cuttings in the early morning, they will be saturated with moisture; if you start cuttings, having previously prepared a container of water and immediately put cut cuttings into it, this will help to avoid drying out. Perhaps the cuttings will have to be transported to another place - in this case, they are placed at an angle in a container with wet sphagnum, it is not necessary to spray the cuttings with water. In a container with sphagnum, cuttings can be stored even in the refrigerator, but for a maximum of two days.

The length of the cutting should be 8-12 centimeters, each cutting should contain 2-3 internodes, if the internodes are short, then more. There are plants (lilac, mock orange, roses, grapes) in which leaf-bud cuttings take root best of all, that is, a very short part of the stem with a leaf and a bud, which is located in its bosom. From this bud, the stem of the new plant will emerge. Usually, the lower part of the shoot is used for cuttings, but if the optimal timing for cuttings is missed and summer is coming to an end, you can also take the upper part.
The tool with which the cuttings are cut should be as sharp as possible so as not to squeeze the shoot tissue.

The lower, oblique cut of the cutting is made 1-1.5 centimeters below the kidney, and the upper, horizontal, immediately above the kidney. The oblique bottom cut helps the cutting to absorb moisture better.
Techniques to improve rooting
Cuttings will take root better if, 2-3 weeks before cuttings, darken, wrap part of the shoot, which will be immersed in sand, with foil or non-woven material. This method is called etiolation. It is used, for example, when cutting lilacs and other crops with poorly rooted cuttings.

Sodmaster
As my friend, a candidate of agricultural sciences, said, cuttings think that they have already taken root, and give new roots.

Fig1. Before growth begins, the area of the shoot is darkened.
Fig2. The base of the escape is tied.
Fig3. The cutting "thinks" that it has already been planted and forms roots in a darkened area.
If the plant has large leaves, such as viburnum or lilac, they can be cut in half on the eve of grafting - this also contributes to a better survival rate of the cuttings. But there is one subtlety here - many forms have insufficient chlorophyll content, and by cutting the leaves, we will make it difficult for the cuttings to form roots. This applies to all crops with variegated, purple, yellow leaves.
Bending the branch or cutting the root 22 mm next to the buds also helps the cuttings take root.
The correct soil temperature will significantly improve the chances of successful rooting of the cuttings.

Grapevine FORUMHOUSE participant
Comfortable temperature for them - the process has begun! The heat pressed down - everything rotted ...
We will tell you about the successful experience of rooting some cultures by FORUMHOUSE participants.
How to cut lilac
Cuttings take root quite difficult, this culture is easier to propagate by budding. However, this is possible if cuttings are cut at a time when the lilac is just beginning to fade, subject to high humidity and a temperature of + 23-25 degrees.


Sodmaster
Some varieties (Joan of Arc, Buffon, etc.) take root well. Others (for example, the Beauty of Moscow) are very difficult, and most importantly, for a long time, sometimes even for the next year after grafting.
How to cut a mock orange
Mock orange reproduces well with unusually large cuttings: in spring or autumn, cut shoots up to half a meter high are simply stuck into the moist ground next to mock orange, currant or other plants that give a lace shadow.


Sodmaster
A year later, young plants are ready for planting in a permanent place.
How to cut girlish grapes
Girlish grape cuttings are cut before sap flow from young shoots (up to four years old), but lignified shoots at the age of one year are best rooted. The size of the handle should be 25-35 cm, while it should have 3-4 buds. Cuttings are planted in well-dug, light, loose soil to a depth of about 20 centimeters.
Obtaining high-quality varietal planting material is one of the important aspects of the cultivation of apple trees. There are many different ways and methods of growing seedlings. We will help the gardener to understand this difficult issue, we will acquaint you with the most productive and affordable options for propagating apple trees by cuttings.
Cutting an apple tree: is it possible to grow an apple tree from a cutting
The answer to this common question is unequivocal - yes, you can. Moreover, this is practically the only way to propagate an apple tree. True, there is still the possibility of growing it from a seed, but this is a rather painstaking method that requires a significant amount of time. With it, varietal features are not preserved and it has not found wide distribution. The main purpose of cuttings is to obtain seedlings for propagation.
There are two methods for obtaining an apple seedling from a cutting - grafting onto a stock (the so-called plant to which a bud or cutting of another plant is grown) and rooting a cutting without grafting. Let us reveal in detail the essence of the second method.
Timing of propagation by rooting cuttings
All methods of obtaining seedlings from cuttings by rooting without grafting involve obtaining a finished plant by autumn. Depending on the method, the process can begin at the end of winter or in spring. More specific dates will be indicated below when describing the methods of rooting.
Propagation of an apple tree by rooting cuttings
This method is used in two main cases:
- For growing rootstocks in order to further obtain seedlings by grafting.
- To obtain own-rooted seedlings.
The method consists of the following steps:
- Preparation of cuttings.
- Storing them (if necessary).
- Rooting.
- Landing in the ground.
Propagation of an apple tree by lignified cuttings
Lignified cuttings are usually rooted in spring, and harvested in late December - early January. To do this, choose one- or two-year-old lignified shoots located in the middle part of the crown on the south or southeast side of the tree. They must be absolutely healthy, without signs of disease and damage. Following are two options:
Method for stimulating the processes of concentration in future cuttings of hormonal growth substances
It is distinguished by a high percentage of survival - according to information from various sources, it is at least 70%. The method is as follows:

Callus in plant biology is called cells that form on the wound surface of a plant. Callus tissue, as a result of the division of cells bordering on the wound, forms corked areas - as a result, wounds heal, vaccinations grow together, etc.
Rooting lignified cuttings at home
From the selected - as described above - branches are cut into cuttings 10-15 cm long with two to three internodes and placed in a container with wet sand for storage (the cuttings must be completely covered). The air temperature must not exceed +2 °C. Start rooting in late February - early March. For this:

The described method can be improved in an interesting way. Before placing the cutting in a box with nutrient soil, stick its lower end into an ordinary raw potato (all eyes are first removed from it). Then the lower part of the cutting, together with the potato, is buried in the soil. Further steps remain the same. According to some evidence, this technique increases the rooting of the cuttings and they form better roots.
Advantages and disadvantages of apple tree propagation methods by rooting lignified cuttings
The advantages include the following features of the method:
- Preservation of varietal characteristics of the donor. Cuttings can be taken from both own-rooted and grafted apple trees.
- The possibility of reproduction of an apple tree at any age.
- Cuttings are easy to save, they can be sent to any distance without much cost (unlike transporting finished seedlings).
The only drawback of the method, compared with propagation by root cuttings, is a longer rooting time and obtaining a finished seedling.
Propagation of apple trees by green cuttings
This method does not provide a high level of survival - according to various sources, it ranges from 30 to 60%. But since it is possible to prepare green cuttings in fairly large quantities, and completely free of charge, you can always get the right number of seedlings as a result. Another advantage of the method is the preservation of the varietal characteristics of the donor. The disadvantages include somewhat troublesome care and a longer period for obtaining a finished seedling - it is two years. Because of these shortcomings, the method is rarely used in practice. For those who want to try it, we will describe in detail. The procedure should be started from the beginning of May to the end of July, but the sooner the better.
The methodology is:

Video: how to properly root green cuttings
Growing apple seedlings from root cuttings
Root cuttings can propagate apple trees of any variety. It is only important that it be rooted. If we take cuttings from a grafted apple tree, then as a result we will get a non-varietal seedling that can only be used as a rootstock for grafting a cultivated variety on it. The second condition for obtaining a positive result is that the donor apple tree must be young (not older than 5-7 years), since with age its ability to form root shoots decreases sharply. Cuttings are harvested in autumn by cutting parts of the roots with a diameter of 5-10 mm and a length of 10-15 cm, while not forgetting to mark their ends, which were closer to the trunk. Until spring, the cuttings are kept under a layer of sand in the cellar at a temperature not exceeding +5 ° C. And you can also dig cuttings in the garden. To do this, in an unflooded place, they dig a small groove, on the bottom of which a layer of sawdust is poured. The laid cuttings from above are also covered with sawdust and sprinkled with earth. If the winters in the region are cold and with little snow, then the place of digging is additionally insulated with improvised materials - spruce branches, dry leaves, sawdust, etc. It would be useful to put poisoned baits for mice in the storage place.
Planting begins in early spring with the onset of bud swelling. The technology is as follows:

The main advantage of the method is a shorter period for obtaining a seedling than when rooting a lignified (and even more so green) cuttings. But even faster (and with the same quality result) you can get a seedling by using a root shoot (shoot) as it. Disadvantages of the method:
- Impossibility of propagation of grafted trees.
- Impossibility of reproduction of old trees.
Growing seedlings from root cuttings
In the spring, soil is poured around the trunk with a layer of 20 cm and constantly watered during the season. The following year, roots with sprigs of overgrowth grow from the sprinkled area of the trunk, which are cut off and used for reproduction. Of course, this method is applicable only to self-rooted apple trees.

The next year, after powdering the bole, roots with sprigs of overgrowth grow from it, which are cut off and used for reproduction.
Video: getting apple seedlings from root cuttings
Rooting cuttings on a tree (air layering)
Quite an interesting method of growing roots directly on a tree. For the purposes of this method, in May - June, the strongest branches with good growth are selected. Next, proceed as follows:

This ancient method, although not widely used, has practically no drawbacks and can be recommended for use.
Video: rooting of air layering of an apple tree
Propagation of an apple tree by rooting cuttings only at first glance seems difficult. By carefully studying the instructions for obtaining seedlings from lignified, green or root cuttings, the gardener will find the most suitable method for a particular situation.
Numerous manuals have been written on rooting cuttings. But in the process of grafting and root formation, a lot of details are sometimes found that decisively affect the final result.
The easiest way to root cuttings is in a jar of water.
Under certain conditions, it can be used even for plants that are considered difficult to root. But despite the simplicity of this method, there are many subtleties on which success depends.
How to conduct it? What can be done to make rooting cuttings easier? What little things need to be considered when cutting? Let's try to answer these questions.

Should I change the water in a jar of cuttings?
It is better not to change the water during evaporation, but to add it.
Not all plants tolerate this change of water. In all likelihood, some necessary metabolic products accumulate in the water in which the cuttings are rooted. So it was noticed that passionflower cuttings, which had already given roots, repeatedly died after changing the water. Moreover, the water was well settled, without harmful impurities. Therefore, it is advisable not to change the water, but to add as it evaporates.
How much water should be in the jar when cutting?
For example, a plant such as honeysuckle does not give roots in a 200 ml jar if there are more than three cuttings in it. And if you place the cuttings one at a time in smaller containers, the rooting of the cuttings occurs without problems.
It is important not only the amount of water per cutting, but also the level of water in the jar. For the formation of roots, the presence of oxygen is necessary; it is not without reason that roots form at the border of water and air. If the vessel is too deep and there is a lot of water, there is not enough oxygen in the lower part, which leads to decay of the cutting. The experiments of the British showed that when the water in the vessel was aerated during cuttings, the roots on the cuttings formed along the entire length and in a shorter time.

The choice of shoots for cutting cuttings.
It is important to choose the right shoot from which to cut the cutting. Oddly enough, from the main, powerful shoots that grow up, bad cuttings are obtained. Good quality cuttings are obtained from lateral, not too actively growing branches. So, do not chase power and size.
You should not take thin, fruit twigs that have stopped growing. It is better to take those shoots that are still growing. Usually take on the cuttings the middle part of the shoot. It is more convenient to cut the cuttings into three buds. If the deficit - in two, and even in one.
Some coniferous plants, for example, spruce and spiky yew, have an interesting property. From cuttings taken from side horizontal branches, disheveled, sometimes even almost creeping plants are obtained, while from cuttings from vertical branches, vertical trees are obtained.
If one long shoot is taken for cutting and cut into several parts, then it is essential from which part of the shoot the cutting is taken. Cuttings taken from the lower part of the stem take root better. When cutting roses, it can often be observed that from cuttings obtained from a stem that is equally lignified along the entire length, only the very last one, cut from the very base, takes root. This also applies to other cuttings, such as passionflower.
How and when to cut cuttings?
This time, time matters: it is better to cut early in the morning - there is more moisture in the cuttings. Daytime and evening cuttings should be kept in water for an hour before planting, updating the cut with a sharp knife.
Depending on the type of plants and the ability of the cuttings to root, it is customary to divide the cuttings into groups.
Green cuttings - cut from early to mid-summer, in the morning.
Semi-woody cuttings - cut at the end of summer, no more than 15 cm long.
When cutting cuttings from a green unripened shoot, the cut is made directly under the node or bud. The tissues located in this place are more resistant to fungal diseases. If a more mature lignified shoot is chosen for grafting, the cut is usually made in the middle of the internode.
Lignified cuttings - cut during the dormant period of plants (late autumn - early spring before bud break), no more than 25 cm long.
For all types of cuttings, the rule applies - you need to cut the material from a strong healthy shoot. Trim the cuts with a sharp knife. They should be even, without scuffs and tatters.
Green cuttings can be successfully propagated: grapes, geraniums, larkspur, forsythia, chrysanthemum, mock orange and berry crops.
Lignified cuttings reproduce well: viburnum, dogwood, rose, plum, spirea.
From any shoots: green, semi-lignified and lignified, you can cut a stalk, consisting of a bud with a leaf. Such cuttings should be 2.5 - 4 cm long. The upper cut is made as close as possible to the kidney, it is advisable not to leave the hemp at all. The upper cut is made as close as possible to the kidney (if possible, without leaving a hemp). The lower one is 2.5-4 cm from the upper one.
Each cutting must consist of:
- a very short segment of the stem;
- one sheet (the other sheet is removed);
- a bud located in the leaf axil.
It would be possible to leave all the leaves on the cuttings. But, being in the water (and, even more so, when rooting in the substrate, when the water supply is limited), the extra leaves dry out the cuttings, which can cause them to die.

Methods for cutting cuttings.
On the left is a nodal stalk, its lower cut is directly under the node or kidney. This is how unripened green cuttings are usually cut, since the tissues located in this place are more resistant to fungal diseases.
On the right, a cut in the middle of the internode. As a rule, this is done when cutting cuttings from more mature (lignified) shoots.
If the winter stalk uses its reserves, then the summer stalk is basically what produces the green leaf. There is a difficulty here. The leaf needs more light to make its own glucose. But at the same time, it must evaporate water, but there is still no water in sight - the roots have not grown. It will not evaporate water if you create one hundred percent humidity. So film is needed. But in the summer, under the film, everything burns out in an hour. The solution to the problem is in the exact selection of a place for a greenhouse. There should be almost no direct sun there - well, maybe until eight in the morning and after eight in the evening, and individual sunbeams are not contraindicated. But there should be a maximum of free sky. Normal - under the northern wall, and so that there are no trees and houses nearby. Or under the crown of a large tree, around which there is an illuminated space.
The bed is done the same way. The same layer of sand or screenings spilled with stimulant and half the dose of fertilizer. A wire frame 20-30 cm high. A clean film is stretched. One edge is dug in, the rest are hermetically pressed to the ground, but in such a way that it is easy to lift the film. That's the whole device, called a cold greenhouse. If, at the same time, a reflective screen is arranged that would cast light from the open part of the sky and from the dark side, rooting will be even faster and more powerful. A sheet of aluminum, a mirror film, or just something white is suitable for this. The reflective effect is very noticeable.

The role of light in plant propagation by cuttings.
Light has a significant effect on the rooting of cuttings. If the cutting has at least part of the leaf, it needs light to root. At the same time, a cutting without leaves gives roots better in the dark. The reason for this is that if the cutting was harvested at a time when the plant no longer had leaves, it contains a certain amount of heteroauxin, which stimulates the formation of roots, which, in all likelihood, decomposes in the light. And in the presence of green leaves, heteroauxin, on the contrary, is produced. From this point of view, it would be better to leave a large number of leaves on the cutting, but in this case, the evaporation of moisture occurs more actively and the cuttings dry out. Therefore, it is recommended to remove most of the leaves, and sometimes even cut off the halves of the remaining leaves.
So, the light factor during cuttings affects as follows. A cutting that has no leaves grows better roots in the dark.
To root a cutting that has at least a piece of a leaf left, light is needed.
It is worth noting that in light-colored dishes, even in the light, roots form worse than in dark ones.

Storage and planting cuttings.
For green cuttings, fold the chopped material into a plastic bag or put it in water. Green cuttings must be planted on the day of cutting. Green cuttings are not stored at all without moisture. In a damp package, they can be worn for half a day at most, while they cannot be wrinkled. Putting them in water, they can be stored for a couple more days, but the leaves should not get into the water, and it is better to put a transparent film bag on the jar to increase air humidity.
It is enough to weed and spill such a greenhouse from a watering can once a week. It is better, of course, to arrange wick watering. When the shoots begin to grow rapidly, the film can be removed, but you need to water more often. You can feed once every two weeks, and if humus is added, you can not feed at all. Subtlety of care: leaves stuck to sweaty film or sand quickly rot. Make sure this doesn't happen.
Lignified cuttings can be stored until spring in a bag in the refrigerator or in the sand in the basement.
For green cuttings, to prevent excessive moisture loss, cut the leaf blades in half. In plants with a hollow core, the lower cut of the cutting must be filled with paraffin so that there is no decay. This process consists in covering the cuttings with a thin film of paraffin. This is done as follows: the upper ends of the cuttings or a seedling with eyes located on them are immersed for a moment in molten paraffin, the temperature of which should be + 75-85 ° C. If you use paraffin heated to a lower temperature, then its layer on the cuttings is formed too thick and then it often crumbles. Paraffin is heated in a water bath. It is impossible to warm up paraffin on an open fire, because its temperature can be much higher than recommended, and this will lead to burns of the tissues of the cuttings, in addition, paraffin heated to a high temperature is flammable.
For waxing, you can use ordinary technical paraffin, or just ordinary paraffin candles. In order for the paraffin to stick to the cuttings better and its film to be elastic, bitumen and rosin can be added to it, 30 g per 1000 g of paraffin. If beeswax is added to paraffin, up to 10% of its weight, then cuttings and seedlings can be waxed at a lower temperature. The use of paraffin, which has good anti-transpiration properties, makes it possible to increase the survival rate of cuttings in a shkolka (this is a mini-bed, a place for cutting seedlings, rooting cuttings, cuttings of perennials, i.e. where plants are growing with different growth periods) and planting seedlings of their subsequent hilling with earth.
Choose the distance between the cuttings according to the size of the plant so that the leaves do not touch. This time we deepen it purely symbolically: semi-lignified - by the lower third, grassy (mint, lemon balm, etc.) - by 2 cm. In summer, the cuttings rot especially quickly, and the roots climb even better if the moisture is not quite close. Deepen green cuttings into the ground to the leaves.
Bury the lignified cuttings into the soil so that 2-3 buds remain above the surface. Above the ground should be 2-3 cm cuttings. Keep the soil moist.
Try rooting whatever you want. Look at the cutting for real: it is a living organism that has everything to survive. There is a kidney and a cambium for roots. A stalk is almost the same as a seed. Even the ends of perennial currant branches, cut in August, and sea buckthorn branches, cut in September, take root. Even two- and three-year-old wood takes root.
Moreover, the ability to take root by cuttings is brought up. Plants have a "memory" for rooting! First, about a third of the cuttings take root. Cuttings taken from rooted plants already survive by two-thirds. And the cuttings from them take root already one hundred percent. Michurin described this in detail.
And that is not all. The most unrooted cuttings can be prepared for guaranteed rooting. And even make it take root "without leaving the branch."

How to root everything that does not want to take root.
The most reliable way to root a plant is to make layering. A branch, dug into the ground and moistened, gives its roots over the summer, without risking anything and without stopping in growth. In the spring, it can be cut off and planted where needed. So you can reproduce anything. And the trees are doing great. Layering is not done because most gardeners are accustomed for some reason to raise the crown high above the ground. At Yury Ignatovich Trashchey in Vasyurinskaya, the trees sit almost horizontally. Their branches fall and dig in, then dig in again, and the trees can “walk” around the garden, forming a stunted “tree-garden”.
And the Chinese noticed in ancient times: if a branch is placed strictly horizontally, several shoots climb up from it. If such a branch is buried, roots form under each shoot, and several plants can be obtained.
The uterine branch (shoot) has to be pinned firmly to the ground and watered well. The method is called: Chinese layering. It is used for propagating rootstocks in nurseries: an overgrown seedling is buried in a groove, leaving only the top in the light. By autumn, a “comb” of shoots grows, and everything with its roots can be divided.
And in Kazakhstan, a varietal tree is buried in two directions for three years in a row. The main skeletal branches become, as it were, a rhizome, underground trunks are formed, overgrown with roots. And on top are fruit-bearing branches. This greatly improves drought tolerance. And in a cold climate, God himself ordered to use this technique.
Rooting on a cutting can be enhanced and accelerated by cutting or removing a portion of the bark on the underside of the branch. Here, substances flowing from the leaves will accumulate, and an influx will form, containing a mass of root primordia. If only one layer is separated, the bark can be cut into a whole ring. All substances will settle here, and swelling is formed, which is even better.
Michurin, who at the age of ten effortlessly planted anything, learned to use it. There was always a shortage of land in his nurseries, and he came up with a method of air layering. If the branch cannot be lowered to the ground, then why not raise the earth to the branch? Turned out to be enough water. Ivan Vladimirovich used a device made of rubber and glass tubes. In May, young twigs were ringed; in July, the tube was filled with roots. Only the apple trees balked: until the very autumn, the roots might not appear. But here's what's important: all the "stubborn" branches formed an excellent swelling, and it was covered with pimples of root primordia. All these branches, planted in the beds in the spring, rooted perfectly! Conclusion: by simply ringing the shoot at the beginning of summer, we are preparing it for confident rooting.
It is easy to ring young currant or gooseberry branches at the base and cover them with earth or put on a bag, box, kefir packaging filled with moist soil. The harvest is ripe - cut off the branches with berries. The berries are in business, and the branches already with roots are in the ground. Year - and new bushes. It’s a miracle with grapes in general: ring the fruit shoots at the base (those on which the tassels ripen) in June, and in the fall you will cut not anyhow, but chibouks ready for rooting. And if you are not too lazy to tie the soil, then in August-September you can plant a chubuk with roots. In the spring, it will powerfully grow, developing three branches at once. Win a year! If this becomes a habit, we will have a late summer planting stock market.
All this was developed and described back in the 20s. Michurin really hoped that our gardening would be transformed thanks to his methods. “This method of rooting, when fully developed, promises a great revolution in horticulture in the future. In this case, it will be incomparably less to wait for the beginning of fruiting compared to grafted trees. Here is N.I. Kurdyumov’s option for creating layering.
In May-June, the border of last year's and summer wood is clearly visible: the place where the shoot began to grow from. Remove a centimeter-wide ring of bark immediately below this joint. We also make furrows for the formation of roots 3-5 cm long. It is better to take a growth shoot, without branching - it is more convenient to put on a bag. From below, we firmly tie the bag on the palm below the ring of the removed bark. All the kidneys inside the package must be blinded. We put raw rotten sawdust, a rotten leaf, moss, a little humus or soil in the bag. Moisturizing is average, in no case dirt! Quantity - no more than a glass. From above we tie the package 2-3 cm above the furrows. Now let's wrap it all up in a couple of layers of newspapers and secure them: the sun should not heat up the bag too much. This is all. Sometimes you can come up, take off the paper and see what is being done in the package. As soon as the bag is filled with roots, the growing shoot can be halved. After a week, you can plant in a well-spilled hole. You need to cut off the branch along the bottom edge of the package, and remove the package when landing.
Both two- and three-year-old branches can be rooted in this way. Of course, planting them in the summer is a big risk, and you need to wait until the fall. But from such branches fruit-bearing, undersized trees are immediately obtained.
You can “take away” a whole young tree! A three-four-year-old tree can ring the trunk. Strengthen, as expected, a container with earth - a bag or box. water. By autumn, roots are formed, and the tree can be cut off and planted - of course, greatly unloading the crown. And from under the ring new shoots will climb - from them in a couple of years a new crown of a headless tree will grow. So two trees are made from one tree in one summer. This is especially popular in the tropics.
Is it possible to carry out cuttings of plants during the dormant period.
Surprisingly, many plants reproduce best when they are dormant. For example, a large percentage of spring cuttings of blackcurrant die, and those planted in the ground in autumn take root much better.
Sea buckthorn branches harvested at the end of January - February form roots in water after 1 - 2 weeks in a jar of ordinary water. A good effect is the addition of honey to the water for the rooting of sea buckthorn. A tablespoon of honey is diluted in a glass of water and the cuttings are left in the solution for 6-12 hours. When cutting sea buckthorn in winter, it is important to remember that the roots on the cuttings grow quickly and if they are not transplanted into the soil in time, they will outgrow and can easily break off.
Also, experienced gardeners say that the yew berry and common thuja, which gave roots in February - March, were planted in the ground in May - June and took root well.
How to choose a mother plant.
How well the cuttings will take root also depends on the plant from which they are cut. Interestingly, the ability of the cuttings to root depends on the nutrition of the mother plant. In particular, from his food. If the mother plant is not fertilized, the rooting of the cuttings obtained from it is difficult. If it received top dressing with a high nitrogen content, the cuttings also give roots very poorly. In order for the cuttings to form roots easily and actively, fertilizers for the mother plant must contain a sufficient amount of potassium and phosphorus and a small amount of nitrogen. If it received nitrogen in excess, then the roots on the cuttings form very poorly.
It is also difficult to form roots in the cuttings of the plant that “starved”.
Also for plants that are difficult to root, the age of the mother plant is a significant factor. Cuttings cut from older plants do not take cuttings well or do not take cuttings at all, even if the cuttings are cut from annual shoots and even when they are treated with a root formation stimulator. Conversely, young plants produce rooting cuttings even in those species that are not usually propagated by cuttings, such as apple and pear trees. But in order for such cuttings to give roots, they need to be treated with heteroauxin.
At the same time, for easily rooted plants, the age of the mother plant does not matter.
Selection of part of the shoot for cuttings.
It is also important from which part of the shoot the cutting is taken.
Often, very long shoots are taken for cuttings, from which a large number of cuttings are immediately cut with secateurs.
The lower the segment of the stem from which the cutting is taken is located, the better it takes root in most plants.

Growth stimulants for cuttings.
To increase the likelihood of rooting, to accelerate the formation of roots on the cuttings (especially difficult to root), to obtain a more powerful root system, it is recommended to treat the cuttings before planting with growth stimulants (phytohormones), which contribute to the beneficial accumulation of organic substances at the root formation site. For successful cuttings of woody plants, growth stimulants are often used:
- heteroauxin (fine crystalline powder of white, pink or yellowish color);
- beta-indolylbutyric acid (outwardly similar to heteroauxin);
- beta-indolylacetic acid and alpha-naphthylacetic acid (powders of white or grayish color).
Growth stimulants have a high biological activity, therefore, they are used in very small concentrations (according to the instructions). For processing cuttings with solutions of growth stimulants, glass, porcelain or enameled dishes are used. Processing of cuttings with growth stimulants is carried out in a darkened room at a temperature not exceeding 20-23 degrees (a higher temperature is dangerous, and at 28-30 degrees cuttings are poisoned).
Three methods of stimulating treatment of cuttings are most often used:
- immersion of the lower ends of the cuttings in aqueous solutions of stimulants (solutions of low, medium or high concentration are prepared);
- immersion of the lower ends of the cuttings in alcohol solutions of stimulants (used to treat cuttings of plants that cannot be in water for a long time, as well as to propagate rare and valuable plants);
- treatment of the lower ends of the cuttings with dry growth powder (a mixture of growth stimulant with talc or crushed charcoal, usually at the rate of 1-30 mg of the stimulant per 1 g of talc or coal).
Root formation of cuttings is even more enhanced when their lower ends are treated with a mixture of growth stimulant with vitamin C (ascorbic acid) or vitamin B1 (thiamine) before planting. Vitamins also contribute to faster growth of shoots in rooted cuttings (however, the use of vitamins alone to improve root formation and better growth of shoots in cuttings, without the use of growth stimulants together with vitamins, does not give a positive effect). When preparing aqueous or alcoholic solutions of a growth stimulator, when preparing growth powder, one of the above vitamins is added to them, after dissolving its powder in a small amount of water. After preparing an alcohol solution of the stimulant, vitamin is added to it in a concentration: vitamin C - 20-50 mg per 1 ml of 50% alcohol, vitamin B1 - 2-20 mg. When preparing growth powder, dissolved vitamin is added to it at the rate of: vitamin C - 50-100 mg per 1 g of talc or coal, vitamin B1 - 5-10 mg per 1 g.
A freshly prepared growth stimulator solution, together with a vitamin solution added to it, is used immediately after cutting the cuttings; the depth of immersion in the growth stimulant solution depends on the length of the cuttings and the degree of their lignification. Green cuttings are immersed in a solution of 2-4 cm (no deeper than a third of the length) and kept in it from 10 hours to a day (according to instructions); processing time depends on the concentration of the solution and the type of stimulant. The small length and the presence of leaves in green cuttings contribute to enhanced absorption of the stimulant by the cuttings along with water. Lignified cuttings are immersed in the solution for half or two-thirds of the length of the cutting.
In growth powder, prepared in advance for processing cuttings before planting by dry method, the content of the growth stimulator can vary considerably (depending on the desired activity of the stimulator). To prepare growth powder, the stimulant is first dissolved in water, and then this aqueous solution is thoroughly mixed with talc or coal and a vitamin solution. The resulting mixture is dried in a dark place at a temperature of 50-70 degrees; the powder is stored in a tightly closed opaque container. To process the cutting, its lower part is moistened with water, powdered with growth powder and planted immediately.
Amateur gardeners often use Epin, Kornevin, Sodium Humate, Zircon, aloe juice when rooting cuttings as growth stimulants. Also, seeds and corms, divisions of perennial plants are soaked in growth stimulants before planting. The Epin solution has proven itself very well as a natural bioregulator when used for spraying in order to maintain plant immunity during rooting, before and after picking seedlings and under stressful growing conditions for plants.

Some amateur gardeners have recently been practicing a curious method of cuttings, which allows you to root even plants that are difficult to cut.
The cuttings are stuck into a potato tuber, from which all the eyes were previously removed. Then the tuber is buried in the ground, and the stalk is covered with a glass jar and watered regularly. At the same time, the cuttings are supplied with a large amount of nutrients and actively give roots, and the plants grow and develop well in the future.
Surely many on the Internet have seen this method of cuttings. But, you can go for such an experiment when you have a lot of cuttings and you don’t feel sorry if they die. And if you bought 3-5 cuttings, it’s better not to tempt fate and don’t experiment with potatoes.