Bas-relief for walls - the use of ancient art in a modern interior. Plaster flower bas-relief on the wall - master classes Bas-relief paintings on the wall
A bas-relief is a three-dimensional relief on the wall surface - an ornament or pattern that protrudes above the plane. It helps to create an exclusive interior, because each work is unique, and it is impossible to repeat it exactly.
Advantages of a bas-relief on the wall
Not a single type of finish can be compared in terms of aesthetics with a bas-relief. It attracts attention at first sight, looks unusual and interesting. You can create a drawing yourself. The advantages of the bas-relief are:
- originality and showiness of finishing;
- the ability to mask the unevenness of the walls;
- the ability to act as a means of zoning a room.
More more ideas for interior design can be found on the website https://masterinterera.ru/

You can create a bas-relief in the interior with your own hands, and this is another advantage of this type of wall decoration.

I don’t want to glue wallpaper, and painting the walls seems not an interesting enough way to finish - complement it with a bas-relief, which can be created from various materials:
- gypsum;
- plasters;
- clay.

The base can be made of wood or metal - they are poured or processed, creating original compositions on the wall.


Types and themes of bas-relief
Not every relief pattern on the wall is called a bas-relief, but only one whose elements protrude from the surface by no more than half. If more - this is a high relief.

The wooden bas-relief looks original in the interior, if you choose it according to the design style of the room, the color that matches the color of the furniture. In this case, it will harmoniously fit into the overall style.

Bas-relief ideas can be varied. Depending on the style, these can be plant and animal motifs, abstract elements or antique scenes look aesthetically pleasing. Size, plot and difficulty will depend on:
- the volume of the room;
- decoration style.

Often a three-dimensional image is made directly on the wall, however, it is possible to install pre-prepared plates with a ready-made relief. We also recommend looking at finishes. decorative panels on this site http://mirstrojka.ru/dekorativnye-paneli/


DIY bas-relief
Many people order wall decoration with volumetric drawings from specialists, however, knowing what to make a bas-relief from, you can do the work yourself.

For a bas-relief based on putty, you will need:
- putty;
- glue;
- putty knife;
- cutter;
- acrylic paints;
- brushes;
- stained glass outline.

At the first stage, a sketch of the future three-dimensional picture is transferred to the wall surface. It is transferred to paper, covered with a film and the contour is transferred to it. An abrasion-resistant marker or felt-tip pen is suitable for this.

Foundation preparation is the second stage. It is necessary to apply acrylic putty, fine-grained gypsum is the basis of the future bas-relief. They need to be leveled and allowed to dry, but not completely. After 15 minutes, you can get to work - transfer the drawing to the wall.

Fix the film on the wall with masking tape, circle the pattern so that the image is printed on the wall. Simple Ways creating a bas-relief for beginners involves the following steps:

Putty is applied along the contour on the wall - one layer after another. Subsequent layers are applied only after the previous ones have dried.


Then, with the help of palette knives, they cut through the image, outlining every detail. The largest and most convex elements must be reinforced with self-tapping screws. So the image will be strong.


When all the details are drawn, the panel needs to be dried well, processed sandpaper. It is necessary to smooth out all the roughness, corners, convex and concave elements. Work at this stage requires accuracy and caution.

After finishing, the drawing is primed and painted. use better water-based paint. In order for the surface around the three-dimensional drawing not to look unnaturally even, apply a small layer of plaster and treat it with crumpled paper, polyethylene, so that the surface becomes rough.

Do-it-yourself gypsum bas-relief has a slightly different manufacturing technology. It is better to use ready-made molds for casting elements from a mixture of gypsum and PVA glue. The mass should be like plasticine.

Using ready-made forms, you can cast individual elements of the ornament, dry it and stick it on the wall. Those parts for which there are no molds, or they are too small for casting, can be molded by hand.

When the whole drawing is ready, all the cracks are sealed with white sealant. Further, as in the case of putty, the bas-relief is coated with a primer and painted. You can apply paint, wax, add gilding.


Bas-relief in the interior
The bas-relief goes well with many finishing materials:
- plaster;
- marble;
- skin;
- tree;
- mirrors.

Numerous photos of the bas-relief on the wall of the living room or ceiling, in arched openings, niches, in bedrooms of different styles indicate that it looks harmonious both in a classic and in a room stylized as an antique interior.

A bas-relief that is simple in shape and pattern will give an original look to a modern minimalist interior, while a classic one is appropriate even in a loft style.

The bas-relief will be appropriate in different rooms:
- in the living room, with the help of a bas-relief, you can recreate the interior of an ancient castle, palace, or, conversely, complement a modern interior with it;
- in the bedroom original solution will be the placement of a large panel above the head of the bed or the entire wall;
- in the kitchen room, a three-dimensional panel is appropriate in the dining area or on kitchen apron. You can decorate a whole wall or a free niche in this way;
- in a spacious bathroom, a bas-relief can complement the decoration of the walls with marble.
- in a large hallway, you can decorate part of the wall with stucco molding; for a small room, it is better not to use three-dimensional images.

Small stucco elements can complement a plain wall if paintings, photographs, shelves with souvenirs, collections are placed on others. This way it won't look empty.


Volumetric floral pattern fills the space well, without overloading the interior.

The room can be transformed if you complement the design with a few stucco elements on the walls or ceiling. Sometimes a bas-relief can become a compositional, organizing center of a room.

When creating a bas-relief, it is important to provide the right lighting so that the three-dimensional image “plays” - this will achieve the maximum decorative effect.

Photo of a bas-relief on the wall


I want to decorate my house, make it cozy and hospitable. In a typical building, it is more difficult to create original design, but you can find a way out. An interesting, and at the same time elegant solution would be to create a bas-relief on the wall. It can be made from various materials, in addition, you can do the creation of a three-dimensional image yourself. About the variety of bas-relief, its features, application can be read below. There is also a master class, thanks to which you can independently master this technique.
Bas-relief in the interior
To create a bas-relief image, you can use such materials like:
The walls are decorated with:
- landscapes;
- figures of people;
- plants;
- items.
These can be full-fledged artistic compositions. Thus, they can decorate the building inside and out.
The cast parts of the decor are made of polyurethane or gypsum, and hand, author's modeling is done using putty, polyurethane glue.
The bas-relief is often used in modern interior. The technique of such compositions is different, this allows you to correctly place the bas-relief in a room of any style.
Bas-relief compositions will help to develop and complement the main theme of the interior, to place the necessary accents in the house. Stucco molding in the living room helps to achieve a special solemn atmosphere. In the bedroom, she creates an atmosphere of intimacy, in - the appearance of imaginary movement. All this helps to change the impression and create the necessary mood.
On an empty wall, you can create a panel in the form of a picture. If the bas-relief is highlighted, then all the convex details will look even more distinct. They are often used to decorate different openings.
Unlike decorative painting, bas-reliefs do not have to be highlighted with color. If desired, it can be left white, and it will look just as good. You can combine these two options, you get an original and unusual effect.
The bas-relief goes well with such finishing materials:
A simple stucco molding can give originality to a room in a minimalist style, it is suitable for a loft style, a classic.
Material use
Bas-relief compositions will be well combined on stone, in forging, together with wood and other natural materials. They are often used in the decoration of fireplaces. If there is a clock in the hallway, then modeling can be done around. In small rooms, you should not make large panels.
Advice
The attention of guests will be attracted by a bas-relief with illumination. If the room is in classical style, then with the help of stucco molding you can fill the arch opening, the free space between the doorway and the ceiling.
If there is plasma in the living room in the middle of the wall, then such a relief decor can be made around it. It can also be used in the bedroom, especially if there are forged items, elements. You can place a large panel above the head of the bed.
With the help of a bas-relief, you can hide the bumps on the wall, and turn decorative elements from flaws. Also, engineering communications can be hidden behind the modeling. On a bare wall, you can create an integral picture, a landscape that will flow into beautiful decorative plaster.
Scene selection
Modern bas-relief allows you to recreate any idea. It could be:
- simple abstraction;
- landscape;
- flowers;
- panorama of the city;
- World map.
If the cast parts of the decor are chosen for the kitchen, then it is better to choose symbols that will characterize the abundance in the house, pictures with fruits and vegetables. In a children's room, it can be a light, airy decor featuring butterflies, birds, flowers, castles.
The bas-relief can be made the main composition, or it can be performed as an ornament that depicts separate scattered fragments or climbing flowers, a vine. It is used to decorate rooms, the facade of the house and other buildings.
plaster molding
Gypsum is a fairly popular material. All thanks to such qualities as fire resistance, environmental friendliness. This natural material well suited for creating stucco. Thanks to this, complex elements of relief decor can be created. And in order for the structures to last longer and be durable, they use a special varnish, primers, glue based on silicone or polyurethane. To protect the product from ultraviolet rays and precipitation, it is coated on top acrylic paint.
The gypsum bas-relief composition can be given the appearance of wood, bronze, cast iron, or artificially aged. Using drying oil, you can imitate sculpting under ancient marble; shellac varnish is used to create terracotta. And to recreate antique bronze, a mixture of distilled water, copper sulfate or just oil paints is used.
If you want originality - add a little antiquity
Before painting plaster molding should dry well. It is cleaned of dust, then primed. Mostly they use water-based paint for the ceiling, the painting itself is done with oil paint.
Polyurethane molding
The material is a plastic foamed by a special technology, it is environmentally friendly, does not absorb bad smell, excess moisture, and resistant to temperature fluctuations. It looks good, and is suitable for its qualities for such premises: bathroom, kitchen.
Polyurethane stucco - ecological material
With the help of polyurethane moldings, you can visually correct the room. For example, you can visually make the ceiling higher and expand the room with the help of an overhead convex plank (molding), a vertical ledge in the wall, a pillar (pilaster).
They resort to molding to separate wallpapers of different tones. Stucco molding made of polyurethane can decorate interior doors. To facilitate the work with this material, a special adhesive for polyurethane is used.
With the help of such stucco, you can not only decorate or update the interior, but also furniture, you can create panels or frames, decorate ceilings, fireplaces, pedestals. Polyurethane stucco can be used in various areas, decorate products, parts, structures.
It will be of interest to you: REVIEW: Elegant Tapestry in the interior: combination with styles, design ideas (100+ Photos). How to create a cozy design with your own hands? (curtains, bedspreads, paintings)
Bas-relief master class
You can also make stucco molding on your own, for this it is taken
- gypsum;
- clay;
- alabaster;
- gypsum plaster.
Even a beginner can create a bas-relief design. In this case, it is better to use gypsum and plaster based on it. Maybe a chic picture will not work, but you can decorate the room with a relief image. The main thing is to follow the entire sequence of actions exactly:
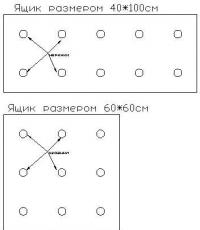
- A box with low walls is assembled from slats and plywood, which looks like a tray. In dimensions, it must correspond to the dimensions of the future relief slab, there it will be necessary to create a bas-relief. In addition to the box, you can take other means, for example, an ordinary candy box, or a frame of suitable sizes, only pre-glue it to the glass with adhesive tape.
- It is necessary to cover the form with polyethylene. The foam must be straightened so that there are no wrinkles on top. If alignment fails, at least leave a minimum of irregularities.
- The solution is prepared exactly according to the instructions of its manufacturer, and poured into the mold. When planning to create an ornament with a high relief, wire is installed in the slab to further reinforce the composition.
- In order for the mixture to initially set, it must be left for a while. It is impossible to say exactly how long it will take, because. The indicator is different for each material. Just before using this or that raw material, it is necessary to clarify all the nuances of working with it.
- You can start creating the bas-relief itself. First, the contour of the necessary decorative ornament is applied to the tile. Then you can begin to increase the volume inside the circuit from the newly prepared mixture. The volume is built up in layers so that each layer hardens a little.
It is not difficult to work with plaster, it is even convenient, but while the raw material is wet. At this time, you can get rid of the excess, use a knife, and adjust the ornament with a chisel, a chisel for woodworking
If the material is not completely dry, simply plaster it. Dealing with an already hardened surface is much more difficult.
If you need to make an in-depth image, then you can do this in the following ways:
- The layer of the background itself needs to be built up around the figure, it will turn out that all the elements will be in a small depression. Everything is completed by grinding the background plane.
- Images can be deepened if you select a small amount of base material using cutters, chisels.
Self-creation of a bas-relief image is painstaking work, it requires time and considerable costs. But, with a reasonable approach, the design of your home can be given an original, even unique look.
Types and themes for creating a bas-relief
Ideas for creating such a relief design are different. Their size, complexity and plot depend on the style and volume of the room. You can depict animal or plant motifs, antique scenes or abstract elements.
The image of a tree is one of the most neutral and versatile solutions.
A three-dimensional picture can be made on the wall itself, or a pre-prepared plate with a ready-made relief image can be installed.
Flowers
Swans
Wood

Rejection of generally accepted clichés, decorating your home in such a way that it is unique, adding a special zest to it is not easy fashion trend but a completely justified and natural expression of a person's own individuality. A bas-relief in the interior will become a truly exclusive decoration, and you can create it yourself.
The royal palace, the castle, the family estate of an influential family - this is where you could most often find bas-reliefs in the past. This was due to the complexity and high cost of creation. Gradually, the fashion for them came to naught, but now, with the advent of inexpensive and affordable materials, these decorative ornaments are experiencing a rebirth, perfectly combined with a wide variety of styles in the apartment.
Features of the bas-reliefs
Several features of the bas-reliefs that favorably distinguish them from other types of interior decorations:
- You can make this decor element from any material (from papier-mâché, gypsum, decorative plaster, polystyrene, metal, etc.), which is sufficiently plastic or suitable for pouring into a mold.
- Modern bas-reliefs are easy to perform and install, they are lightweight and affordable, but if they are made from natural materials (wood, stone), then at a considerable price they look really unique, extraordinary and exclusive.
- The plot of the image is chosen based on the tastes and needs of the customer, it can be antique, antique, neutral or emphatically modern.
- In addition to visual appeal, such decorative elements will help hide communications, defects, and surface irregularities.
Bas-relief as an interior element
Bas-reliefs will help to dilute the dullness and monotony of plain surfaces of walls and ceilings, especially when adding decorative elements or additional inks is undesirable.
Even the simplest bas-relief drawing will enliven the surrounding space if you manage to choose the right lighting.
A universal solution for all styles in the design of walls and ceilings are the branches and trunk of a tree or an abstract pattern that can fill the wall without overloading the space.
A bas-relief can be created in several ways:
- by molding directly on the wall surface;
- by manufacturing individual elements with subsequent mounting on the wall;
- in the form of a three-dimensional picture made on a solid basis (for example, on a gypsum-fiber sheet).
Novo-bas-reliefs
In 2014, Applico presented a novelty in the world finishing materials. New bas-reliefs in the interior - flexible plates of different sizes with a color or monochrome pattern printed on them. Their distinguishing features:
- possibility of mounting on any surface;
- excellent noise and thermal insulation properties;
- plate flexibility;
- bio-, thermo- and moisture resistance;
- safety for humans and the environment.
The plates are mounted on the walls, according to the numbering indicated on them, they are fixed with a special adhesive.
A photograph of the new bas-relief is presented below:
Bas-relief painting
As we have already mentioned, the materials for creating bas-reliefs can be different. But beginners are advised to start with gypsum mixed with plaster. Do not worry, even the simplest plaster molding will ennoble the room, giving it elegance and solemnity.
The easiest kind of volumetric decor element to create on your own is a bas-relief-picture. The advantages of such a product:
- for this type of bas-relief, you do not need to prepare a wall;
- there is no fear of failure: if the picture does not work out, you can postpone work for a while or even abandon the idea, the decoration in the room will not be spoiled;
- a bas-relief in the form of a picture at any time can be moved to another place, taken with you to a new place of residence.
Stages of self-creation of a picture in the technique of bas-relief
- At the same stage, we determine the size of the future bas-relief and its location.
It should be understood that the larger the size of the image, the more space is needed to “read” it; on small stucco molding, the decor will be correspondingly smaller, more detailed, and will require more skill.
- We prepare a sheet of GKL or GVL, draw on it a sketch of a future three-dimensional picture.
- We knead the gypsum plaster and apply it with a palette knife - a special spatula for painting - on the work surface. You can form parts with palette knives of various shapes, fingers, brushes. There can be several layers of material, the main thing is to wait for the previous one to dry.
- After drying, the surface of the bas-relief is polished with fine sandpaper and primed.
- If desired, the bas-relief can be painted, subjected to the procedure artificial aging to give it an antique look.
Before deciding to paint a bas-relief, think carefully: beginners in most cases are disappointed with the results of this stage, since it requires special skills and knowledge. In addition, a white or only slightly tinted bas-relief in most cases looks much better than a product painted in different colors.

Volumetric images on the wall can become original decoration interior. Unlike moldings (decorative overlays), they are created only by hand. Production of high-quality bas-relief - painstaking work, but with a great desire and the presence of at least elementary modeling skills, you can create it yourself. Beginners can use stencils.
Materials and tools
To create a bas-relief you will need:sketch of the future image;
pencil, marker;
plastic sheets for creating stencils;
Bas-relief stencil
masking tape;
color or paint for gypsum solutions (if the bas-relief is colored);
paint brush;
palette knives: steel or plastic blades used to create textured and embossed images;

Palette knives
Gypsum, plaster, clay, alabaster or other plastic material.

Gypsum kneading
Create a sketch
Even if the work will be done using stencils, it is necessary to make a life-size sketch of it to check how the drawing will fit with the rest of the decor of the room. You may have to correct it - remove the excess or, on the contrary, add details to close some gaps. The finished drawing is transferred on tracing paper or thin film.
Transferring an image to film
For beginners, it is better not to use too voluminous images with multi-stage relief. A large flower or a composition of several flowers, fruits or berries, branches with leaves, the simplest contours of animals, birds, etc. will look quite original on the wall.

A three-dimensional image may consist of several simple details transferred to the wall using a stencil
Surface preparation
The bas-relief is performed on a pre-leveled and plastered surface. To increase adhesion to gypsum or plaster, it primed at least 2 times. indoors with high humidity it is better to use an antifungal composition.So that the wall does not look perfectly flat, you can apply a base of acrylic putty or satengipsa(fine-grained gypsum). To obtain a relief surface after applying the solution, the wall is treated with a roller or spatula with chaotic strokes. A fairly original and convex pattern can be obtained even with crumpled paper or film.

Obtaining a relief surface using a wrinkled film

Venetian plaster

Creating an uneven surface with a spatula
Looks very original bas-relief with backlight. In order not to damage the image and not cover it with dust, it is better to install lamps for it in advance.

Volumetric image on the wall with backlight

Bas-relief lamp
Making a bas-relief
1. To move sketch on the wall, you should fix the carbon paper on it, and then attach the drawing on top with masking tape. Places of gluing in the future are carefully rubbed.2. You can transfer the sketch to the wall in another way. To do this, a small layer of solution is applied to it, a drawing is applied, and its contour is outlined with a palette knife with a pointed end, a match or a toothpick.
3. If the bas-relief is voluminous, it is better to twist it in the thickest places of the image self-tapping screws. They will act as reinforcement, preventing the image from crumbling.
4. Material for stencils should be thick enough. Moreover, the more voluminous the bas-relief is, the greater the thickness of the stencil should be. It should be removed very carefully so as not to damage the image. A damaged bas-relief can be corrected at any time.
Advice. You can remove minor irregularities and flaws after the plaster or gypsum has completely dried. To do this, along the edges of the picture, you should walk with fine sandpaper.
5. Convex images can also be obtained using wall mounts cardboard blanks or pieces of foam, followed by coating with a solution. It will hold on stronger if the blanks are pre-treated with a primer.

The blank for the bas-relief can be fixed on self-tapping screws
6. Additional strength to large elements of the image can be given with a regular or plaster bandage soaked in a solution. You can buy it at any pharmacy.

Plaster bandage
7. Plaster, gypsum or alabaster are diluted with water according to the instructions. The solution is thoroughly mixed.
8. Mortar is applied to the wall in several layers. Each subsequent layer should be performed after the previous one has completely dried.

Drawing an image with a palette knife
9. Convex parts are rolled out with your fingers, and then attached to the wall, slightly pressed down and leveled.

Bas-relief of grapes
10. The last layer of the image is best done from a finishing (fine) putty, which is easy to grind.
11. Drawing small lines and sealing cracks is done at the end of all work.
12. Thin veins on leaves and flowers can be applied with a medical syringe.
13. The finished drawing is covered with a primer. Such a topcoat will not allow plaster or gypsum to crumble.
Advice. So that the bas-relief does not crack when it dries, it should be periodically moistened with a damp brush.

Entrance door decoration
14. You can colorize the image with the most different ways: like using adding acrylic paint colors directly into the solution, and by applying paints for gypsum mortars with an art brush. Excess paint is removed with a damp sponge.

coloring image
Advice. You can get subtle color transitions when applying paint to a still wet bas-relief.

Finished Image
Terra technique
Work in this technique does not require special skills. Just stock up ahead of time. dry branches, herbs, flowers or ears of corn. You can also use sand, cereals, noodles, small stones, etc.On primed with PVA glue wall (it should be diluted in a ratio of 1: 1), using the same PVA, a composition of dry plants is pressed. After the composition has completely dried, the drawing is covered with glue several more times, and then processed with acrylic paint or finishing putty.


Advice. If you treat the foliage and flowers that have not yet turned yellow with glycerin, they can be preserved. In this case, real color pictures of herbs and leaves can be created on the wall. So that they do not crumble, they are treated several times with PVA glue.

Bas-relief of sunflowers treated with glycerin
The modern kitchen is increasingly moving away from outdated norms in the design of this place in the house. The fashion includes originality, brightness, bold design, combined with convenience and practicality. The wall design sets the tone for the entire kitchen. And in this case, we are talking not only about wallpaper or painting, but also about wall decor. Among the large number of wall decor options in the kitchen, there is sure to be one that you like and will be available for implementation, for example, a drawing on the entire wall.
Kitchen decor
Ideally, the design of the walls is fully thought out at the stage of the kitchen project and if you are at the stage. But a number of possible ways of decor can refresh the kitchen even when the old design is “bored” and you are not ready for a major renovation. Consider possible examples of wall decoration in the kitchen.
Drawing on the wall
A great opportunity to make the interior stylish and original - drawing on the wall. This solution is suitable both for focusing on one of the walls, and for filling an empty space. The drawing can be applied both with a stencil and hand-painted.
To make the design fashionable and beautiful, such techniques as accenting zones, unusual combinations of materials can.
Acrylic drawings
In order to apply a picture on the wall that will delight the eye, you must either have the appropriate skills or contact a professional artist. Any interior designer can draw on your project, this is a fairly popular service.
Wallpaper is removed from the wall on which the drawing will be applied, the wall is leveled and painted in one tone. First, a drawing project is created, applied to the wall with a pencil. Then, after the approval of the project, a painting is made. A drawing on a wall properly prepared for application can last more than 10 years.
Before drawing a picture, you need to take care of the absence of all unnecessary elements that can reduce the effect of the picture: sockets, switches, protrusions. If it is impossible to get rid of them, they must be skillfully included in the composition.
Drawings with liquid wallpaper
The computer can also be used for the geometric method. On the Internet, you can find free special color matching programs and determine those color combinations that will look most aesthetically pleasing in your interior.
There are also ready-made mosaic modules, the choice of patterns is quite wide and satisfies any request. The technology of laying such a mosaic is greatly simplified.
For creating mosaic panel special matrices, mosaic grids are used. The squares are glued to the frame and a tile of a certain size is obtained. How to transform old table ceramic worktop find out at.
To create complex drawings, you can use special computer programs, they will help to divide the image into squares with great accuracy, select the optimal color for each fragment so that the resulting image is as close as possible to the original.
Mosaic laying
The mosaic laying process consists of the following steps:
1. Preparatory work. The surface on which the mosaic matrix will be applied is carefully leveled and primed. It is very important that the surface is well cleaned and dry.
2. Surface marking. Matrix sheets should be laid out on the floor according to the drawing, measurements should be taken. Then control marks are placed on the wall in accordance with the measurements.
3. Apply glue to the surface. After that, the laying begins directly. The adhesive does not need to be applied immediately to the entire surface, otherwise it will dry before the entire mosaic matrix is applied. The matrices are stacked and, after the final adjustment of the sheets to each other, are firmly pressed into the adhesive solution.
4. Grout. After you make sure that the solution has solidified completely, remove the protective layer from the mosaic, after soaking it. Do not wait for the grout to dry, as the grout will then be difficult to remove.
Mosaic adhesive must be of color, its type is selected in accordance with the surface material. A special spatula suitable for applying the adhesive solution should be about twice as large as the sides of the mosaic module. Proper selection of the spatula will prevent the adhesive from protruding onto the surface of the mosaic when laying it.
Bas-reliefs in the kitchen
Bas-relief is a three-dimensional painting technique, a convex image that stands out above the surface of the wall. The bas-relief may take the form different items, figures.

The bas-relief is made exclusively by hand from gypsum, plaster, clay, putty and other materials.
The bas-relief, additionally illuminated by a directional lamp, looks quite impressive. You should not create too majestic bas-relief: it is not easy to maintain and may look out of place in the kitchen.
Stucco in the kitchen
In the old days, such decorative elements as bas-reliefs and stucco moldings could only be afforded by very wealthy people. There are currently available materials and simple technologies that make it possible to design rooms in ordinary houses in this way. Stucco is created from gypsum or polyurethane. Polyurethane is considered the most suitable, as it is lightweight, resistant to moisture and easy to install. Exist big variety possible stucco decoration elements: rosettes, borders, plinths, domes, cornices and other products.
Ceiling stucco molding is very popular in the kitchen. It gives the room a sophisticated look, allows you to hide some defects in the finish, and can also be used to install hidden lighting.
Watch the video of the master class on how to make a bas-relief with your own hands:
Volumetric drawing in the interior in the kitchen
With the help of decorative plaster, you can make any design ideas: ethno motifs, landscapes, retro elements and much more. A tree, columns or flowers protruding against the background of the wall looks great. Volumetric drawings are created using special stencils, but complex decorative panels can create a guest artist.

Modern bas-reliefs look unusual, stylish and fashionable.
The stencil allows you to apply a three-dimensional image yourself. To do this, you need to strengthen the stencil, put a layer on top plaster mixture, after which the stencil is removed and, after drying, cleaned, leveled and painted.
What to paint on the wall: types of decorative painting
When choosing a plot for a picture on the kitchen wall, first of all, you should consider the still life option: the association with food looks appropriate, creates comfort and increases appetite. The theme of winemaking, images of gourmet dishes are well suited. Another classic option for the kitchen is various plants, flowers and birds, tree branches. Learn about the secrets of harmony in the kitchen according to Feng Shui by.
If you want to create a feeling of spaciousness, the pattern should be light. For this purpose, the image of landscapes, windows, valleys is well suited. Drawings of warm colors, picturesque compositions with nature, the old town, images of cutlery and funny chefs will help create comfort.
But even a beginner can draw such a drawing
So, modern tools allow you to create an unusual and unique design that does not require large financial costs and time to invest work. Remember that decor is primarily wall art and a flight of fancy. Therefore, after reading all the tips and tricks, also apply your intuition and imagination, and then you will find the very idea (theme) for your interior that will create the right atmosphere, warm the house and surprise your guests! And you can practice creating an interior in services where you can.