Drawing of a country table for self-production. DIY wooden table (photo)
We continue to equip country cottage area. Today we’ll talk about how and with what to fill dining area or recreation area. It is difficult to imagine a cozy gazebo or a shady canopy without a table and comfortable benches or chairs.
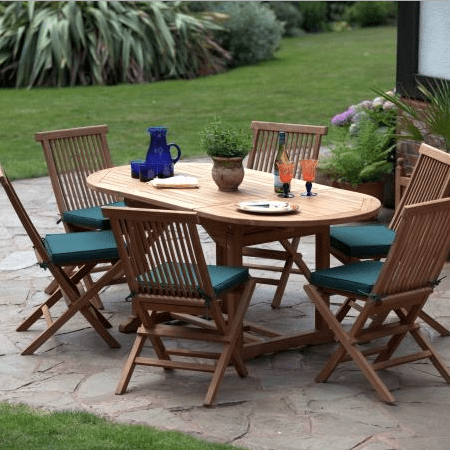
Today, garden furniture manufacturers offer a huge variety of tables: large and small, wooden, forged, wicker or plastic.
Of course, you can buy a finished product, but many prefer to make garden furniture with your own hands.
About how and from what material to make a table, how to decorate the countertop will be discussed in this article.
Wooden outdoor table
Undoubtedly the most malleable and eco-friendly material is a tree. A wooden table can be made round, square, rectangular or irregular in shape, it all depends on the size of the gazebo or the number of seats. As a tabletop leg, you can use a regular stump.

The shape and appearance of the table largely depends on the style of your country house and exterior. A log house can be supplemented with furniture made from logs and boards. The main tool for processing parts is a grinder, since the surfaces of the tabletop and benches must be smooth, without nicks.


The tabletop can be made from slats or a narrow board, strung on metal rods, or by connecting them with short slats.

A table made of wooden saw cuts looks interesting, especially if there is one on the site.


There are several ways to make such a table:
- connect the saw cuts to each other with brackets or tongue and groove, forming a flat surface;
- fix the cuts on some kind of base (in this case, the parts must be of the same thickness to form a flat surface). The product must be sanded and varnished. If desired, the gaps between the cuts are filled epoxy resin, after drying of which, the surface is polished again and covered with a protective compound.
A garden table made of wood with benches, made of a single design, looks great both in the gazebo and in the open area.


It's easy to make. Use the diagram below to make your own drawing and calculate materials.

When drawing up a drawing, consider some generally accepted standards:
- bench seat height from ground level - 400-500 mm;
- seat width - 300-400 mm;
- tabletop height from floor level - 700-750 mm;
- tabletop width - 580-900 mm.
The length of the table and benches is individual. The figure shows an example of the manufacture of a table with benches located on two long sides of the tabletop. Similarly, you can make a design with benches on four sides.
And here is a small version round table with stationary benches-stools for four seats. It is easy to move it to the place you need at the moment: to an open area, under a canopy or in a house.

If you wish, you can purchase or make your own folding garden furniture, which can be easily installed in any part of the garden or in the house.

Such furniture will last longer, as it will not be constantly exposed to precipitation. The weight of such products is small, they can be easily and quickly transferred to permanent place storage in the house or barn, where they do not take up much space.
In order for the product to serve for a long time, all wooden elements must be treated with an antiseptic and coated with varnish, wax or paint. To give the wood the desired shade, use a stain or a special impregnation with pigment.


Garden table from improvised material
Earlier we already talked about furniture made. A stylish table made of pallets is cheap and organically looks on personal plot. The design, complemented by furniture wheels, is also mobile.

Ordinary stumps, decorated with mosaics, look very original and can serve as a small table or stools in the recreation area. Suitable for mosaic decor various tiles, left over from the repair, chopped into small fragments and laid on tile adhesive or cement mortar.

The originality of this composition lies in the creative approach of the owners. The most ordinary stumps turn into a work of art.

An old table that has fallen into disrepair can also be decorated with mosaics and thereby update the tabletop. Remove from legs old paint sand them down and repaint them. Such garden table will serve the owners for a long time and will gather around him a family for lunch and tea drinking.

A wooden reel for winding a cable can also serve as a table, it is enough to process it and decorate it a little or simply paint it in the desired color. The table will be easy to move if you attach wheels to the bottom.


Many have things that they inherited, as they say: it’s a pity to throw it away, and there is nowhere to put it. Try to be smart and use them when arranging a summer cottage. As legs for the table, you can use the base of the old sewing machine, metal headboards and much more. By the way, you can simply buy a countertop and install it on top of a metal structure.

Those who have weaving skills can make garden furniture from vines with their own hands. If you are not capable of such feats, but love wickerwork very much, then you should go to the store. Manufacturers offer tables and chairs made of wicker, rattan or artificial fibers for every taste and budget.

Metal garden furniture
If you are "friends" with metal, you have welding machine, then you can make garden furniture from this material. Such furniture, as a rule, is openwork and original. In order for the product to serve for a long time, the metal must be protected from corrosion before it is used. One of the most simple ways protection of metal surfaces is a primer that is applied to the product before finishing painting.

Forged furniture for summer cottages is an excellent solution for respectable homeowners. Only craftsmen can make it blacksmith forging with the appropriate equipment and the presence of a forge.

Forged products are perfectly combined with many materials: wood, glass, marble. If desired, you can purchase a forged blank for the table, and fill it yourself.
Stone table
Recently, small architectural forms from stone. Including on sale you can find tables and benches made of marble or granite. Such products have a high cost.

But this is not the only solution. You can independently make a stone base for a table and benches, for example, from rubble, flagstone, brick or blocks, fitting them into the overall look of the garden, combining them with other stone buildings.
As you can see, there are quite a few options for arranging a recreation area on a personal plot: from cheap, practically worthless, to expensive ones. A table made with love will surely gather wonderful people around it, and joint gatherings will bring pleasant moments.
Of course, today everyone has the opportunity to buy any furniture in the store, including a table. But why not make it yourself, with your own hands?
This is not as difficult as it might seem at first glance. In addition, you have the opportunity to make such a table that will ideally fit in size and appearance to the interior of your kitchen or other room.
In addition, do-it-yourself furniture is not only saving money, but also some kind of, but a reason for pride, since not every man knows how to make something these days.
What are the tables
If you decide from the boards with your own hands, then you need to figure out what types of tables are, and decide what exactly you need.
The simplest is an ordinary table with four legs, a table top and a frame. It will not be difficult to make it even for those who are not experienced in woodworking.
If you are experienced enough in this matter, you can make the dining table round or oval, decorate it with carvings, paintings, or burn patterns and patterns on the surface.
More difficult option is from planks. In fact, this is the same ordinary table, but rather thick and long crossbars are attached to its legs, on which seat boards are laid on top. So we get a table with benches on both sides. Such furniture is well suited for both the kitchen and for installation in the courtyard of a private house or cottage.
If there is free space in the room only in the corner - make corner table, which will fit perfectly into this unoccupied space. It may not be as convenient to dine behind it as at a classic table, but you can put a TV, microwave or kettle on it - there will be enough space there.
 Another interesting option can become a window sill table.
In fact, this is the same window sill, but significantly expanded and adapted, for example, for a convenient workplace for a student.
The advantage of this solution is that the table will be well lit for most of the day.
There is also a minus: sitting at such a table in winter, you will have to rest your feet on a very warm, even hot radiator, which is not very convenient.
Materials and tools
 Buying everything you need to make a table with your own hands is quite simple and will not be difficult or expensive. The main material for dining table is a tree, more precisely:
- Boards 25 to 50 mm thick, 100–150 mm wide, quite long.
The thicker the material for the tabletop, frame and legs, the heavier, but at the same time more durable they will be.
Choose boards from good tree, without any defects. - Bar. It is necessary for the manufacture of table legs, so choose thick enough and strong samples. The beam can be replaced with the same boards, if you arrange them with the letter "G", or use purchased aluminum table legs. You can also use balusters (curly carved wooden posts that support the railing on some stairs) as legs.
- Chipboard or plywood sheets, which can be used as countertop materials. Choose samples that are thick and strong enough to withstand daily stress.
 As with the materials and Do-it-yourself tools and fasteners are easy to get, they are in most homes. If something is missing, you can buy it at the nearest hardware store.
- pencil, corner, roulette and ruler;
- jigsaw or hacksaw on wood;
- screwdriver with a set of nozzles and drills;
- plane, if it is necessary to pre-treat the boards from irregularities and defects;
- kit self-tapping screws, furniture bolts and nuts;
- sandpaper or Sander;
- varnish or stain, roller or tassel for processing the finished table.
Attention! When working with a jigsaw, always remember the safety rules and keep small children or pets away!
simple plank kitchen table
 First we need to make a countertop.
There are several options here:
- Cut out a piece of the desired size from a sheet of chipboard or plywood using a jigsaw;
- Lay several fairly wide boards and subsequently fix them on the frame;
- Take a large number of relatively narrow boards, place them side up and glue them together with wood glue.
The result is a fairly thick, heavy and durable countertop.
Stages of work
Step 1. Collecting from boards countertop.


Step 2 We make a frame from boards or their wooden bars. In size, it can be made equal to the tabletop or with a slight indentation, about 2–2.5 centimeters on each side of the table. Having fastened the parts of the frame with screws, connect the frame with the tabletop with them.
Step 3 After we with put together the frame and the tabletop, half the table is ready. It remains to make only his legs. If a timber is used for this, drill two holes in it for furniture bolts. Moreover, they can be made both on the one hand, one above the other, and on two different ones for more secure fastening to the frame.
Important! Carefully check the length of the table legs, they should not differ from each other. Otherwise, the table will stand unevenly and stagger. If you do not want it to spoil the floor material, fix rubber “shoes” at the bottom of the legs.
After that, make similar holes in the table frame and fasten the legs and frame with bolts and nuts. Also, the legs can be fixed from above, using screws, but over time, this fastening may weaken.
 If you want to make table legs from boards, fold two boards into an “G” on the outer or inner corner of the frame and secure them with all the same furniture bolts or screws.
To prevent the legs from loosening, connect the folded boards together at the bottom and middle parts with screws or nails.
That's all, simple and reliable, do-it-yourself, ready!
Advice: Before proceeding, do simple drawing, preferably from several sides. Constantly check the dimensions of the parts. Some parts of the same size can be sawn out at the same time if you fix the boards or timber with clamps.
pallet table
 Wooden pallets are widely used in shops and warehouses as cargo pallets.
If you wish, you can get a few pieces for free and use them as a basis for making an original and unusual kitchen table.
If at least one side of the pallet surface is solid, then you no longer need to make a countertop, it is ready.
You just need to process it and, if desired, round the corners.
Note! Since initially the pallets are intended for warehouses, no one is engaged in their grinding and cleaning. Therefore, before making a table out of them, carefully sand them and remove all burrs. Irregularities and defects of the boards can be hidden with putty.
Stages of work
Step 1. Most of the pallets are open and there is plenty of space between the boards. distance, due to which to use the surface of the pallet as countertop not too convenient. There are two ways to solve this problem: either boards appropriate size and to fix with their screws between the boards of the pallet, or install a sheet on top plywood or chipboard.


Step 2 As for ordinary table, table legs from pallets can be made from timber or boards. The best thing fasten them with thick enough and strong pallet beam with nails, screws or furniture bolts.


To prevent the legs from loosening, connect them to each other with crossbars.
One of better ways to make the adjoining area truly cozy - to make a table for giving with your own hands. There are several types of country tables, but the most popular are designs made of natural wood. They are distinguished by aesthetics, environmental friendliness and reliability. Products made of combined materials (wood and metal) are also in demand. You can assemble an outdoor table yourself. To do this, you will need boards, carpentry tools and drawings.
The choice of materials for the outdoor table
To make a garden table with your own hands, you need to pick up suitable materials. Special attention should be given to wood:
- Coniferous species (spruce, pine) are characterized by flexibility and ease of processing, but are characterized by increased flammability.
- Hardwoods (aspen, birch, oak, larch, ash) are more difficult to process, but strong enough, durable and attractive.
For a country table, it is recommended to take a board with a thickness of at least 3 cm, as it can withstand serious loads. The optimal length of the table is 150-200 cm, this must be taken into account when choosing boards or a furniture board for the table top. For the manufacture of legs from a bar, it is necessary to choose boards with a section of at least 5x5 cm. The optimal table height is 75 cm.
Convenient picnic table
You can make a table for giving with your own hands using the simplest drawings. However, such a product will be bulky, it will be quite difficult to move it. But the folding structure can not only be easily rearranged from place to place, but also taken with you on a picnic. At the same time, even a novice master can make an outdoor table of this type according to ready-made drawings.

Such a table is not only compact and attractive in appearance, but also durable (the product can withstand weight up to 100 kg). At the first stage of work, it is necessary to cut out the structural elements in accordance with the drawing. The dimensions of the folding product can be changed, the main thing is to maintain proportions.

The edges of the legs and footboards need to be rounded off. If you are just learning the craft of a furniture maker, then it is better to cut the corners of the elements at a right angle, and then smooth them out with a grinder. This is easier than rounding the edges with a jigsaw.
To connect the structural parts in accordance with the drawings, you need to use bolts of any diameter (preferably 6 mm), 35 mm long and with a screwdriver thread. If the bolts are longer than 35 mm, they will create obstacles in the operation of the future mechanism. When all the elements are prepared, you can pre-assemble the folding table. The legs should be connected to each other in the central part, and then screwed to the supports as shown in the drawing: the left leg - to the front support, the right one - to the back.

If everything is done correctly, then you can attach the supports to the tabletop using self-tapping screws 50 mm long. But first you need to make markings on the countertop and drill holes for the screws. Then you should check the performance of the structure, it should easily fold and unfold. When folded, the folding summer table looks like this:
If you are convinced that everything was done without errors, then the structure can be disassembled by signing each part so as not to get confused when reassembling. After that, all elements must be carefully sanded, coated twice with an antiseptic, and then varnished. This is necessary in order to protect the folding table from environmental influences when used outdoors. When everything is done, the structure must be assembled. Now she is ready to use!
Porridge from an ax ... or rather, a table from a stump
Another one great idea for the garden - this is a table made of stump, you don’t even need a drawing to make it. But you will need to find a stump of a suitable size. You can look for a stump in your own backyard, with neighbors or in the nearest forest. For the manufacture of countertops, you can take boards or a furniture board with a thickness of 20 mm or more.

The stump for the future table should be dried, with whole, not rotten and not damp wood. You can dry a fresh stump in the open air or in a warm, dry room. Drying time - at least 2 months. Determining whether the stump has dried is quite simple: if the bark easily separates from the wood, then the stump is ready to go.
For assembly, you will also need a building level, tape measure, wood varnish, sandpaper, grinder, chisel, hammer, nails, screwdriver, self-tapping screws.
Stages of work on assembling a table from a stump
First, the dried workpiece must be cleaned of bark with a chisel or chisel. This must be done carefully so as not to damage the wood and not provoke the appearance of cracks. All soft and rotten areas are removed. Recesses and cracks in the trunk are cleaned of dirt with a chisel, and then processed from the inside of a double-folded sandpaper(grainy layers outward).

Then the stump needs to be leveled from the bottom side so that its bottom becomes even. The protruding parts are removed with a planer. This is necessary so that the table can be installed on a horizontal surface. By means of a planer, other shortcomings of the hemp are also removed, in particular, large rhizomes.
After that, all cuts are carefully polished. Handle grinder you need the rest of the surface of the workpiece. Hard-to-reach areas are sanded with coarse sandpaper. When the treatment is completed, the stump is covered with an antiseptic, and then with varnish. To make the table move easily from place to place, metal or metal can be attached to the bottom of the stump. wooden legs, wheels or rubberized stands.
Then you need to make a countertop. To do this, the boards are fastened to each other with glue, screws or planks nailed from the underside. If you want to make the countertop round or oval, then the corresponding drawing should be applied to the fastened boards, and then the product should be cut out.

To attach the countertop to the stump, you need to make a frame. To do this, two parallel strips are stuffed on the sidewalls of the hemp, and two more rows of holders on top. The result is 6 planks connected to each other with nails. The tabletop is attached to them with screws or nails.
Then the finished structure is once again processed by a grinder and covered with two layers of varnish. To prevent the varnish from peeling off, it is recommended to process the intermediate layers after complete drying with fine-grained sandpaper. The table is ready!
(1
ratings, average: 5,00
out of 5)
There is a table in every house. In dachas and private houses, it is customary to install outdoor models that can be moved around the territory and placed in gazebos and on verandas. A wooden outdoor table for a summer residence is made by hand according to a developed drawing or a finished model is purchased. The product is made of high quality material, adhering to the basic rules of manufacturing.

Model types
Tables can be of any shape and size. They are used for their manufacture different material: wood, plastic, metal. Types of models depending on the materials:


- Plastic. Plastic products are budget option: lightweight, compact, with proper operation have a long service life. It's perfect suburban option furniture for 6-8 people. The shape of the table is round or oval. Direct Sun rays destroy the material, which is one of the disadvantages of plastic furniture. The table is installed in a closed area or securely fixed, because due to its light weight, strong gusts of wind can turn it over.
- Wood. AT country design wooden tables for summer cottages are very popular. These are expensive models that are in perfect harmony with garden plantings. Products must be periodically treated with an antiseptic, because under the influence of humidity and temperature changes, the wood is destroyed. Table legs dug into the ground are prone to rotting.
- Metal. Metal products are highly durable, durable in use and well tolerate any climatic changes. This is heavy furniture that goes well with wrought iron railings and other decorative elements. Metal is often combined with glass and wood, making a countertop out of them. To give stability, the legs of the table are buried in the ground.
Before you purchase a finished model, you must consider the following:
- product dimensions;
- place of installation of furniture: in the house or on the street;
- number of seats;
- product cost.
From what to make a table on the street with your own hands, everyone chooses for himself according to the availability of available material.
Table making step by step
Tables for giving street from a tree carry out independently with the minimum monetary expenses. First you need to prepare a drawing. To build an original product with optimal dimensions, the shape of the tabletop and frame come up with their own. Standard tables have a size of 178x95x77.5 cm. When preparing a drawing, you must adhere to these figures. To work, you will need the following tools and materials:

- boards - 2 pcs. (0.85 × 0.1 × 0.025 m) and 2 pcs. (1.53×0.1×0.025 m);
- boards - 4 pcs. (1.68 × 0.1 × 0.025 m) and 4 pcs. (0.75×0.1×0.05 m);
- boards - 17 pcs. (0.95×0.1×0.025 m);
- drill, saw;
- building level, tape measure;
- fasteners;
- pencil;
- glue;
- wood varnish, brushes.
Protective equipment includes gloves and goggles.
Part preparation

All elements for the table are made of solid wood. The parts must be even, so each of them is carefully aligned and polished. Then treated with antiseptic agents. Oil-based waterproof formulations cannot be used. Despite its protective qualities, the substance has an increased flammability and emits bad smell, which does not fade for a long time. For additional protection the material is coated with a glazing antiseptic. In addition to protective properties, the tool gives the product special decorative qualities.
Frame assembly
All prepared boards for the table top and furniture legs are attached to the frame base, so they begin to assemble a table for giving with their own hands from it. Assembly is done on a flat surface:

- For the frame, end boards with a size of 0.85 × 0.1 × 0.025 m and 4 longitudinal boards with a size of 1.68 × 0.1 × 0.025 m are used.
- The end parts are fixed with self-tapping screws on the longitudinal boards. The frame must be flat, without distortion.
- To give the frame additional rigidity, a second pair of boards is fixed - 1.53 × 0.1 × 0.025 m in size. With these elements, the attachment points of the legs will be outwardly invisible. Before fixing the boards, the base is checked diagonally for skew.
- Boards measuring 0.95 × 0.1 × 0.025 m in the amount of 17 pieces are designed for countertops. They are fastened with self-tapping screws or galvanized nails, leaving a gap of 5 mm between them.
- To make the product easy to store and transport, the legs are bolted to the tabletop. It turns out a removable model.
Mounting amplifiers will make the structure more durable and massive. The table is turned upside down with legs, transverse amplifiers are nailed to the center of the table top. To save free space, their corners are cut off. Several curved amplifiers are nailed to the sidewalls. They must match the shape of the countertop crossbars.
Protective covering
Any wooden structure that is used outdoors is prone to rotting. The sun, rain and other adverse conditions have a bad effect on it. Protect wooden furniture and extend its lifespan by:
- special film casings;
- impregnations;
- polyurethane film.

Polyurethane-based film is the most popular, but over time it wears out, loses its properties and spoils appearance products. If oil mixtures and repellent solutions are used for protection, they must be updated regularly.
For those who live in big cities, a summer cottage is a kind of paradise. fragrant herbs, fresh air, the smell of a fire and always a beautiful house in which it is comfortable and at home. Special comfort country house and the outdoor area is enhanced by custom-made furniture that can enliven the space. In this article we will tell you how to make a table for giving with your own hands.
Agree, it's still easier than making a sofa or wardrobe. To implement your plan, you do not need to specially study or invite specialists. To work, you need inspiration, and prepare the necessary materials.
preliminary stage
The appearance of the finished product is important. When you make a table for the dacha with your own hands, do not neglect it.
It will be nice to observe the admiration and surprise of the guests to whom you declare that you made it yourself.

- Its main basis is wooden table top. As a rule, ready-made shields or wide boards are used for this.
- An important factor is also the selected type of wood from which you decide to make a table:
| Conifers |
|
| Deciduous |
|
- In addition to the tabletop, the table must have legs. You can make them from a wooden shield or buy ready-made ones.
Tip: if you didn’t find them in the store, look at the shelves where they sell auxiliary materials for making stairs - 4 pieces of metal or wood balusters can be quite useful to you.
Factory blanks will add some gloss and chic to your table.

Training
First you need to determine where you will install the furniture, whether you plan to take it out of the house. For example, a narrow and long table would be a good solution for a country house, which will ensure the freedom of movement of people around the room.

Materials and tools
- The boards are tongue-and-groove. They will create a tight connection and help protect the table from liquid getting into the slots. You can also use a pair of ready-made wooden shields, 2000x300 mm in size.
Tip: to ensure the stability of the table to loads, select the thickness of the boards at about 30 mm.
When choosing a material, make sure that the boards or boards are even, they must fit exactly to each other, this will save time on individual measurements and cutting.
- Rails for fasteners - 3 pieces. They are needed for the stability of the structure. The most suitable size is 2000x100 mm with a thickness of 28 mm.
- Table legs (finished) or balusters, their price depends on the quality of the material.
- Hacksaw.
- Self-tapping screws.
- Electric drill. Please note that this tool must be available. You will definitely need it, so if you don’t have your own, then rent it or ask for temporary use.
Tip: if there are power outages in your area, renting a diesel generator for a summer residence will help solve the problem.
- Polyurethane varnish. You can choose between glossy and matte. The second shows the structure of the tree well. Instead, you can use natural oils that will protect the wood from external factors.

In the photo - country diesel generator
- Good quality brushes.
- Sanding machine. Its absence will greatly complicate the work.
- Sandpaper with fine and coarse fraction. This will make it possible to provide the table with the desired smoothness.
Process
Below is a step by step guide:
- Connect the boards or boards and lay them with the outer side down. At this stage, it is necessary to monitor the docking so that the country table is even.
- Attach shields or boards. Position the slats along the long sides. This will allow them to be strengthened and fixed along short boards. To ensure the stability of the table, additionally fix the boards (or shields) with the help of rails in the center in one or two places.
- Be careful when fixing rails. Screw the screws slowly, without changing the degree of pressure, angle and intensity. Otherwise, the shield or rail will break, which will affect the quality of the product.
- Fasten the table legs at a distance of 50-70 mm from the edge. With the help of an additional rail, strengthen the attachment point so that the support does not deform after a while. This will allow the table to look perfect for a long time. Fasten the legs also slowly.
- Turn the table over and remove debris and sawdust, sand all the roughness with sandpaper and a grinder. Dry the table thoroughly with a dry cloth.
decoration
Building a country table yourself is not all.
Now you need to start finishing, and, if you want, decorating.
- Cover the entire surface of the table with polyurethane varnish. (See also the article.)
- Then you need to let it dry for a day.
- Carefully inspect the surface of the table, sand it again with sandpaper and varnish it a second time.
- If you wish, then you can paint the table, for example, with acrylic paint.
- Once the surface is completely dry, the product can be used for its intended purpose.
Conclusion
This article details one of the ways self-manufacturing country table made of wood. Although at first glance the work seems difficult, in fact the process is quite exciting, which will make it possible to make good, solid furniture for little money. The video in this article will help you find more information on this topic.

OLYMPUS DIGITAL CAMERA