Step by step repair. What you need to know for those who start the overhaul of a private house
So that repairs do not turn into an endless process that takes time and resources, you need to properly prepare for its implementation. To do this, you need to know where to start repairing. After all, repair work, like any other, needs a detailed plan. Of course, in each case there will be factors that will make adjustments to the repair of an apartment in a new building or a residential private house (inside, outside, with a rough finish), but general steps can be outlined. Based on them, you can take into account most of the parameters that will ultimately affect the entire construction process.
How to start repairs in an apartment, house and new building?
Instructions for the phased repair work.
1. Preparatory stage
Prepare a folder, notepad, pen, calculator.
This is something that should always be at hand. Something to write down, count, sketch. In order not to look for the necessary information on scattered pieces of paper, it is better to put / write everything in one place.
Advice. For ease of planning, you need to divide each room into components - 4 walls, a floor and a ceiling (if you plan, for example, a two-level plasterboard ceiling) and make notes for each plane separately. This approach is also convenient because the exact dimensions can be applied to the diagram.
Determine the direction of repair and its type
Repairs in a new building with a rough finish are definitely carried out everywhere. But already functioning housing can be partially repaired, Ie. you should immediately decide whether the repair of the entire room, part of it (internal and / or external) or a separate room will be carried out. And also determine the type of repair (major or cosmetic), this will affect the further planning process.
Repair types:
- Overhaul involves significant changes in the premises. It may entail the replacement of windows, doors, the dismantling of walls and floors, the replacement of communications. When carrying out a major overhaul, it is sometimes necessary to contact the licensing authorities and involve specialist repairmen. As a rule, it affects most of the available area.
- Redecorating more simple. It can be carried out on their own. Since it allows you to update the premises at a lower cost, it is recommended to carry out it every 5-6 years.
- - a separate category of apartment renovation, involves the development of a design project, redevelopment, the use of technological equipment and quality materials in accordance with European building standards.
Choose interior style
Today when available various materials and technology, it is possible to choose from different styles of interior design. Some prefer a simple high-tech look, others like modern, and many mix styles, creating a completely individual room. The choice of style will make its own adjustments to the material used.
Search for a repair contractor
You can do the repair yourself or hire professionals.
Repairing an apartment or house on your own reduces the cost of the project, but increases its risk and execution time. This is due to the fact that many ordinary people only approximately know what, how, with what and in what order to do.
Without knowing the specifics of performing a particular type of work, it is difficult to perform them in parallel. Which, in turn, leads to a delay in work. Therefore, even if you decide to work on your own, consult with professionals on key points, technology and choice of material. This will help avoid rework.
Professionals have the experience and the appropriate tools. They can take into account the nuances and foresee many problems. This reduces the risk of getting the job done wrong, but increases the cost.
Advice. It is more profitable to look for a company with a turnkey repair, it will turn out cheaper than attracting several contractors for different types of work.
Here the second question arises, how to choose a construction company?
- Select multiple alternatives. The selection criterion will be: the availability of a license to carry out work, the period of activity on the market, warranty obligations.
Advice. The warranty for the repair of a house or apartment must be at least a year. This is the minimum period for detecting defects.
- Get acquainted with the website of the construction and repair company, where specialization, technologies, portfolio (completed projects), etc. should be indicated.
Advice. The versatility of the company and its employees should alert you. Only a narrow-profile specialist can perform the work qualitatively: a carpenter, an electrician. Those. there should be several people in the team.
Advice. It is worth asking about the repair of friends who have come across the choice of a company and can give good advice.
- Visit the office construction company and communicate directly with a specialist who will oversee the process of work execution.
Advice. If you immediately call the exact cost of the work, and not the range, then you should think about it. You can set the final price only after familiarizing yourself with the scope of work.
- Discuss the exact estimate, terms of work, payment schedule.
 Despite the unpredictability of the repair, it can be planned and implemented with minimal deviation from the plan.
True, this statement is true only for very scrupulous planning and work in a short time. It should be understood that increasing the repair planning horizon increases the likelihood of unplanned expenses.
The material was prepared for the site www.site
An idea or a clear idea of what your house/apartment/room should be like after renovation. This will give an understanding of the type of work and complexity you have to perform. Don't leave it for later.
To understand what the soul desires, you can walk around the guests, read the catalogs, rummage on the Internet. You are unlikely to find the ideal project, but it is quite possible to draw some ideas. A more costly option is to invite a designer. He will offer several design options based on your wishes.
To visualize your representations, you can make a sketch, a sketch, a collage picture, or even a 3D model.
It is at this stage that it is desirable to get a more or less clear idea of the future form of the house - a plan. The plan should indicate: the width of the openings, the location of furniture, lighting fixtures, appliances, sockets, decorative elements. This makes it easier to do the rough work. Of course, the choice of the color of the walls can be left for later, but you need to determine in which place to gouge the walls under the sockets in advance.
Advice. It is better to decide in advance how the walls will be finished. So, for example, walls for painting need finer sanding than walls for wallpaper.
How to make an apartment renovation project with your own hands
Design is an additional paid service. You can order or make your own. If you decide to do it yourself, then you need:
- draw layout
- Draw all the walls and number them (make a schematic drawing of the wall sweep)
- Place on the diagram the location of furniture and household appliances, as well as switches, sockets, lamps and other things. All this should be noted on the plan, and it is desirable to do it on the wall scan.
- Calculate the amount of building material and its approximate cost. (when calculating the material, take into account the laying margin - fitting, trimming, etc.). With this information, you can search for a repair team. The masters will make their calculation, the result of which you compare with your numbers (for sure there will be discrepancies that can be agreed upon).
- Draw up a contract with a clear designation of the terms of work, payment methods, garbage collection, delivery of building materials.
- Control of each stage of repair. For example, they laid an electrician - they checked it, they made the heating wiring - they checked it.
- It is advisable to agree on payment upon completion of work, for example, in stages - they did a certain job, accepted it, paid for it.
Repair time
Many repairs are carried out at a certain temperature. Therefore, most of all it is planned for the warm season. However, at the peak of repair activity, the demand for materials and specialists increases.
This is fraught with delays and higher prices. Comprehensive repairs, professionals are advised to start in the spring, at the very beginning of the season.
Accommodation during renovations
It is more convenient, easier and faster to carry out work in an empty room.
Repair period
Not everyone has the opportunity to leave housing for the duration of the repair, so you need to plan the work in such a way as to meet the deadlines justified by technology and be able to perform work in parallel.
The sequence of repairing an apartment and a house by room
With complex repairs, it is better to start from the most distant room and carry out work in several rooms in parallel. If you plan to stay in the house during work, then you should start with the kitchen or bathroom.
Why from them? Because in these rooms the greatest amount of work, which, moreover, is difficult to do on your own. And such a trifle as cooking in an already renovated room can lead to wallpaper or painting getting dirty.
Advice. Many people leave the repair of the balcony “for later” in order to be able to store materials there. If you do not plan to tear apart the repair of the balcony and the apartment in time, it is better to start from the balcony, and store the materials in the corridor or purchase in parts.
Planning is carried out not only at the beginning of the repair, but also in the course of the work. And the losses from improper planning can be reduced to the following: time, money, nerves, relationships with others (family, neighbors, workers, building materials sellers, etc.)
Apartment renovation sequence
Work procedure:
- Permits (if redevelopment is planned), plus, it is advisable to agree with the neighbors that there will be noise, because. Complaining will exacerbate the process.
- Dismantling of partitions, openings and removal of garbage (if redevelopment is supposed).
- Installation of interior partitions.
- Dismantling of old and installation of new windows.
- Floor screed (note that the complete drying of the screed lasts about a month)
- Engineering communications (wiring, pipe laying, immediately provide for cable entry for the Internet, cable and television antenna, as well as laying the inter-unit line of the air conditioner, connecting the boiler). These works can be done before pouring the floor.
- Finishing work. The sequence depends on the type and method (plaster, frame arrangement for drywall).
For example, according to one scenario, the walls and ceiling are first plastered, then everything is cleaned and garbage is taken out. The ceiling is painted, the wallpaper is glued, the floor covering is laid and at the end skirting boards are installed.
Another scenario: if a stretch ceiling is supposed, then the skirting boards are first fixed to the ceiling, and then the wallpaper is glued, or vice versa, the skirting boards are glued after wallpapering (this is done much less often). Here you need to coordinate with the requirements of the ceiling manufacturer and with the masters, because. everyone has different requirements and sequence.
Doors are installed after wallpapering or before. Installation of interior doors is carried out before finishing walls so that you can putty the joint between the wall and the door frame. But, on the other hand, the joint will foam up, and close with a platband from above. It all depends on the type of finish and timing.
At this stage, you will know the following:
- what work will be carried out with an indication of the timing, performers and cost;
- what materials will be needed for this and in what quantity.
Advice. The more information you have, the more accurate the estimate will be.
The estimate must include the cost of:
- finishing materials(wallpaper, paint, flooring, etc.);
- draft materials (putty, primer, bulk mixture, etc.);
- consumables (painting tape, protective film, sanding mesh, etc.). Despite the insignificant cost, these materials form a separate and very impressive item in the estimate;
- purchased tools and consumables for them;
- the cost of labor of employees;
- Unexpected expenses. Professionals advise adding from 20 to 50% to the final amount in order to be able to cover the costs arising in the process of work associated with changing the project, miscalculation, currency fluctuations or replacing the material with a more expensive one.
Many at this stage are reconsidering some decisions in order to reduce the cost of the project.
5. Acquisition of material for repairs
It is easier to buy all the materials in advance and in one place. This will give you the opportunity to get a discount, save on shipping. But, in practice, this is difficult to implement, because:
- different stores offer different prices for the same materials;
- it may be necessary to return / replace the material, and for most products this can be done within 2 weeks from the date of purchase (more details in the consumer protection law);
- not always the customer has the necessary amount of money.
Purchased materials need to be stored, and not everyone has free space for this. Therefore, you should buy those materials that are needed to start work, and add them as needed.

6. Apartment renovation - where to start
- permits. It is necessary to resolve this issue in advance in case of redevelopment of the premises, replacement of heating radiators or drainpipes;
- protection against damage to what remains in the room during the work. For example, furniture should be covered with covers, and parquet should be covered with durable plastic wrap or cardboard.
- dismantling. Old partitions, unnecessary built-in wardrobes, destroyed screed, peeling paint - all this is removed at the very beginning.
- replacement or repair of windows, window sills, radiators. To keep them clean after repair, it is recommended to tighten them with a film.
- wiring replacement. In advance, you need to outline the location of the wires and choose the right section depending on the load. It is convenient to lay the wires in the corrugation, so they can be easily replaced without destroying the walls;
- replacement of communications;
- leveling of surfaces, arrangement of multi-level ceilings, niches, design of slopes, etc.;
Advice. At this time, you can pour the screed on the floors. In order to grab her, she needs several days, and she will be fully fit for work in 2-4 weeks. At this time, you can walk on it and perform regular work.
- gluing ceiling baguettes;
- fine finishing of the ceiling;
- installation of switches and sockets;
- device floor covering;
- door installation. Doors are installed only after the floors have been poured and the type of flooring has been selected. Otherwise, gaps may be violated and the doors will not open well.
Advice. To prevent the doors from gathering dust during operation, it is better to remove them or tighten them in plastic wrap.
- wall decoration. Before finishing, you need to check that the putty and primer on them are completely dry. Otherwise, the likelihood of a fungus is high;
- installation of plinth, platbands on the door;
- general house cleaning. Allows you to get rid of dust that penetrates everywhere during the repair process;
- installation of furniture and other interior details.
Phased start of renovation in the rooms
We have given general instructions for carrying out repair work. Of course, in each case, certain adjustments can be made. There will be especially many of them if one or more rooms, or even part of the room, are being renovated.
At the same time, the release of the premises from the furniture will significantly simplify the work and ensure the safety of things.

How to start repairing the floor, walls and ceiling
Complete (major) or partial (cosmetic) repair of the ceiling, walls or floor should begin with the release of the surface, removal of wallpaper, paint, flooring. Next, the previous solutions are removed, the surface is leveled, polished, primed and becomes suitable for fine finishing.
How to start repairing a balcony and loggia
Repair of the loggia and balcony should begin with the dismantling (if necessary) of window blocks and interior decoration. Next, new blocks are installed, the balcony or loggia is insulated. Particular attention is paid to their hydro and vapor barrier. The type of final finish depends on the wishes of the owners. Wood, plaster or plastic - these materials are the most common and have proven their worth in practice.
How to start a kitchen renovation
Kitchen remodeling requires the most careful planning since the kitchen is one of the most used rooms in the home. The presence of a large number of kitchen appliances creates an increased load on electrical wiring. Therefore, repairs here begin with the replacement of wiring, the arrangement of additional outlets. Attention is paid to the arrangement of ventilation.
Next in without fail tiled work wall. The rest of the walls are leveled and painted or covered with washable wallpaper. As a floor covering, it is better to use linoleum or tile. A popular laminate in the kitchen is exposed to moisture, which significantly reduces its lifespan. Finishing work is carried out last - installation of plinth, trim, painting of radiators. Installation of furniture, built-in and other appliances completes the renovation of the kitchen.
How to start repairing a toilet, bathroom (bathroom)
Bathroom, bathroom create the greatest difficulties in the repair. First of all, due to the availability of communications and increased requirements for performance characteristics. During the repair of these premises, pipes are replaced, the location of sockets is thought out, additional exhaust systems. The device of additional waterproofing, especially in the case of installing a shower. Most often, walls and floors are tiled. Lastly, plumbing is installed.
It is worth noting that you need to think carefully about combining a bathroom and a toilet (bathroom). The combination option is acceptable only if you have a duplicate bathroom.
Where to start renovating a room
Living rooms, bedrooms, hall do not put forward special requirements. Although in this case it all depends on the manufacturability of these rooms. For example, "smart home" technology requires special engineering calculations and increases the cost of work at times. Repair of these rooms begins with the removal of furniture and dismantling.
Next, door frames are installed. Door leaf, for the duration of the work must be removed or protected with a film. Moreover, if several rooms need repair, work can be done in parallel. As for finishing, it is done from top to bottom, i.e. the ceiling is finished first, then the walls, and lastly the floor. final touch the repair will include the installation of furniture, appliances and decorative elements.
Where to start repairing the corridor
The renovation of the corridor is the last. The work is complicated by the fact that by this time the repair in other rooms has been completed, and the remnants of materials and tools are stacked in the corridor. Thus, first you need to remove all building materials and tools, leaving only the necessary.
Next, the ceiling is repaired and the floor is poured. It is better to fill in before the weekend and leave the room. This will allow the mixture to obtain the necessary strength. Then proceed to the rough finish of the walls, and at this time the floor will stand. The final stage of the repair of the corridor is the fine finishing of all surfaces.
- don't skimp on the material. Especially on the one that will be used for a long time, for example, pipes, radiators, floor screed, etc.;
- don't try to do a job on your own that you have no idea about. Remodeling will cost more;
- don't ignore the little things like priming or using sickle mesh when working with drywall. As the saying goes, “the devil is in the details”;
- do not ignore the ventilation provided by the house plan;
- sketch a wiring diagram for yourself, so that later there will be no difficulties with its repair or hanging pictures;
- when tiling, leave hatches to have access to key nodes of the sewer and pipeline system;
- do not lay smooth tiles on the floor, it is traumatic;
- do not use household linoleum. Despite the assurances of the sellers, it will not last very long. In addition, it will not hide the unevenness of the floor;
- remember, that plasterboard walls may not withstand increased load (for example, hanging a boiler, TV, heavy shelf or chandelier). In some places it is worth erecting aerated concrete partitions;
- buy finishing material immediately before starting work. Otherwise, a situation is possible when it is not enough, and the required color, tone or pattern will not be available from the supplier;
- tinting paint, make a stock of 1-2 liters. It is better to donate this money than to try to match the paint to match or repaint the entire apartment;
- try to allocate space in the apartment for a dressing room and pantry.
When entrusting repair work to the construction team, it is worth:
- draw up a contract for the provision of brigade services;
- step by step check the progress of work;
- take a look at the tool you are using. Your business is to pay for consumables, and not to buy the missing tool;
- not to give large sums in advance;
- if possible, purchase materials together with the team leader. Fraudulent checks are not uncommon these days;
- calculated only after completion certain stage works;
- make friends with repairmen. And then they will answer the same.
Conclusion
Here are considered the key stages of starting and carrying out repairs, each of which must be approached with all responsibility. High-quality repairs can only be done when the process is not left to chance, but carefully thought out and planned to the smallest detail.
Repair in the apartment is now an expensive pleasure. Some save up for it for years, while others give away their last savings and fall into a debt hole. Regardless of the financial situation, everyone tries to save money, but in practice, not everyone succeeds in doing this. We will analyze what materials you can save on, and which ones are better not to, and learn how to expose hired repairmen who are trying to cash in on the ignorance of the owners.
Different types of repairs - how much to pay the master and how to save money?
The final estimate will depend on the type, size of the room and the complexity of the repair. There are three types of repairs: cosmetic, major and renovation. The cosmetic option is the most economical. This repair usually includes painting, wallpapering, sanding the floor. Such work is easy to do with your own hands, saving on calling a specialist. If some specialized tool is missing, it is not worth purchasing it for one-time purposes. Rent it. Make a preliminary estimate for repairs in order to adjust it in advance and find cheaper options. When deciding to hire a private specialist, redecorating an apartment will cost you, on average, 1,500 rubles per 1 m 2, and through a construction company - 2–2.5 times more expensive.
Produce overhaul on your own is much more difficult, since many of the jobs require special skills and abilities. Stages of such a repair: floor screed, wall alignment, demolition and installation of partitions, dismantling of the old coating and decoration, complete replacement water pipes, plumbing and electrical wiring, replacement of windows, doors, garbage disposal. The price for calling a master during a major overhaul increases to 6,000–15,000 rubles per 1 m 2. And that's not counting the cost of consumables.
Here are four tips to help you save money on major repairs:
- 1. Remove old wallpaper, tiles, dismantle the flooring, clean and take out the garbage yourself. Such work does not require special skills and tools, and the savings are significant - 5000-8000 per 1 m 2.
- 2. Do not rush to spend money on finishing an expensive ceiling. Just level and paint it with inexpensive chalk paint. When money appears, sheathe the ceiling with drywall or make a stretch ceiling.
- 3. Do not remove plaster completely. Remove it only in those places where it exfoliates. However, take into account the peculiarity of the finish. If you plan to stick photo wallpaper, the surface must be perfectly flat. It may be necessary to completely replace the plaster, in which case it will not be possible to save money.
- 4. In order not to waste time on paperwork and extra money for garbage disposal, collect the waste in bags and send it to the basement, shed or leave it on the stairwell in a specially designated place, it is provided. Throw away one bag every day in the general trash can, there is nothing illegal about it.
Renovation practically does not differ from overhaul. The cost increases due to the purchase of expensive and natural materials from well-known manufacturers. The price of materials is automatically reflected in the cost of the master's work, which starts from 25,000 rubles per 1 m 2. .
How to check the honesty of the estimate - common tricks
If you decide to involve an experienced team of repairmen in the repair, be prepared that you may be deceived. To test this for sure, pay attention to a few important features. The information will be useful for both beginners and experienced homeowners who decide to start a renovation.

To display the exact cost of repair work, the foreman measures the parameters of your room with his tape measure. It seems that everything is fine and there can be no catch. In this case, we recommend that you give your own tape measure for measurements. Often, cunning repairmen cut the tape measure, for example, by 50 cm, and fasten it to another part of the tape, stepping back 20–30 cm or more. From a real size, for example, 2 m, your room increases to 2.3 m and, accordingly, the price increases, because the cost of work is calculated based on 1 m 2.
Upon receipt of the estimate, carefully study all positions. Often, repairmen duplicate the cost of services under the guise of other work. For example, leveling walls - preparing walls for wallpaper. Read each item carefully so as not to overpay.
Pay attention to the price for 1 m 2. Compare it with other construction companies and individuals beforehand. Prices below average should alert you. Usually, in the process of work, the repairmen who initially offered you a low price raise it and ask you to pay extra for Additional services. The owner gets into a dead end, as the work is already in progress, and the estimate is automatically increased by 2-3 times.
Saving materials and increasing the cost of work is another trick used by dishonest repairmen. For example, you can put a 1 cm layer of plaster for the price of 3-4 cm, shorten the planned route for laying electrical cables or plumbing pipes, and take the rest of the material for yourself. In fact, you overpay for material that does not "work" for you. To avoid such mistakes when performing a turnkey repair, ask the repairmen to photograph the completed work process in detail in stages and send it to you by mail.
If you decide to put a warm floor, remember that it is not placed around the entire perimeter of the room. An unscrupulous foreman will offer you to put a warm floor under the furniture, where it is absolutely not needed, which will also increase the cost of the project.
Complete wiring replacement is another service that almost every foreman will offer you without making sure that you really need it. You can make good money on old wiring made of copper and aluminum cores.
And the last piece of advice: buy materials yourself, do not trust this business to the repair team. As a rule, they buy building materials in the market, where the storage conditions for many goods do not meet the standards. In addition, there repairmen can ask for a blank check with a seal, enter a list of goods themselves and their cost with an extra charge.
In which season repairs will be cheaper - promotions and special offers
It is better to start repairs in the off-season - in early or mid-autumn. This period is suitable for both external and internal repairs. It is still warm outside, and prices for building materials are gradually decreasing by the winter season. Savings on summer goods reach 15-20% without loss of quality. Therefore, if you were planning to spend 250,000 rubles to renovate a room, know that in the fall and winter you can save about 30,000 rubles, which can be spent on renovating the hallway.
Promotions and special offers are a special type of service where you can save. Pay attention to non-liquids. They have a limited shelf life and do not last until the next season. Hardware stores do a good discount on such goods. If you are going to make repairs right now, look at putty, plaster, glue, sealant at a bargain price, below the market average.
Budget plumbing replacement options
Replacing plumbing affects a large part of the repair budget. If it is in good condition, without chips, cracks, and only the surface with an old coating makes you think about its dismantling, we advise you to clean and restore the plumbing. Expensive detergents replace with a mixture of baking soda and vinegar, which destroys stubborn plaque well. Budget option for transformation -. You can cover the bath yourself with enamel, liquid acrylic or order an acrylic liner to fit the dimensions of your plumbing. Restoration will reduce the cost of buying a new bathtub by about 4 times and, depending on the option chosen, will extend the service life old bath from 5 to 20 years old.

If you do decide to change plumbing, consider a budget option purchases from the so-called landfill entrepreneurs. Often upon arrival new house the owners change faience and cast-iron plumbing, which is in good condition, and throw it into a landfill. Resourceful businessmen came up with easy way make money fast and easy. They pick up plumbing in good condition from the landfill, wash and put it in order. They do not expose their contacts directly, working on the principle of word of mouth. In the auxiliary warehouse of such entrepreneurs, you can choose the right plumbing and save a third or even half of the factory cost.
Economical wall cladding and flooring in dry and damp rooms
To save money when cladding walls, we advise you to buy not edged (planed) lumber, but slabs (wood sawing waste). The croaker is sold raw and does not correspond to the quality of the usual materials. It is easy to fix this if you purchase it in advance in March-April and keep it in a dry room until autumn. In addition, slab sheathing saves money on leveling walls. In 80% of cases, it completely hides all the irregularities. Not only to save money, but also to make wall decoration practical, the option of wall cladding with croaker to the waist and pasting the walls to the ceiling with non-woven wallpaper will help. The lower part is resistant to wear and dirt, and the upper one completes the overall picture.
The most budget option for laying the floor in dry rooms is marmoleum. This material requires leveling the floor in only 10% of cases. However, for rooms with high humidity(bathrooms) marmoleum is not suitable, you will have to lay a classic tile. An alternative to marmoleum is laminate. This option is also inexpensive, looks beautiful and is suitable for laying under a plank floor. True, the floor will have to be leveled.
For wall decoration in the bathroom, choose laminated hardboard. Such material is less familiar than tile, but cheaper. The ceiling is better to sheathe plastic panels. Don't skimp on waterproofing. The money spent on it will pay off and extend the life of even the cheapest finishing materials. Instead of gypsum plaster, use a cement-plaster mixture to level the walls. It is not inferior in quality and is cheaper. When deciding to tile walls and floors, buy a solid color finish. Such a tile does not need to be often adjusted and compared with the pattern, less material is used, which automatically affects the purchase price.
What is better not to save on, so as not to pay twice later?
When carrying out major and European-style repairs, it is impossible to do without replacing the wiring. At this event, it is better not to save money and entrust the work to a professional. It is especially important to pay attention to Soviet wiring due to the high power of modern devices, which sometimes the old cable cannot withstand. During the replacement, you will have to use a wall chaser to lay new wiring with high quality. Workers charge for this service from 100 rubles per 1 m 2.
Complete wiring replacement two-room apartment, on average, will cost 40,000 rubles. A private specialist may take less, but he does not give a guarantee for installation, so if a malfunction occurs, you will have to pay the master again for the work. To save money, we advise you to contact an electrician from the DEZ. Such a specialist performs the work slowly as the workload, however, the quality and guarantee of service is a definite plus for choosing this particular master. But sockets and switches can be installed independently.

Another job that you need to involve a specialist and not save: replacing plumbing pipes. Choose your supplies according to your budget. Attracting a plumber will cost, on average, 15,000–20,000 rubles. If you do not have experience in connecting plumbing, we also recommend that you seek help from a specialist.
When mentioning the repair of an apartment, the flight of your thoughts is limited to the picture of the demolition of partitions and the replacement of windows? No problem. Today you will be able to get a brief battle plan called " Stages of repairing an apartment purchased on the secondary housing market". After reading our advice, you will definitely not torment yourself with the question of where to start repairing an apartment with your own hands or with the help of professionals. With the first option, our site dedicated to self-repair apartments. So, let's take a look at the tips.
Where to start the first stage of apartment renovation - the ceiling
Ceiling repair is the most relevant topic for many tenants who have purchased an apartment on the secondary market. After all, most new owners have to deal with a number of “ceiling problems” every day, starting with crumbling plaster and ending with cracks in the ceiling.
Where to begin? To perform the operation of leveling the walls, putty and plaster will be required. Each toolkit is selected individually depending on the scale of the disaster: if the irregularities (small dimples, cracks and gouges) do not reach a depth of more than 5 mm, then puttying can be dispensed with, with a defect depth of more than 5 mm, use plaster.
Well, the finishing touch in such a complex operation is painting and. Paper, textile, vinyl, metallized, cork, non-woven, for children - it remains only to choose a new look for your cozy nest.
The cost of repairs, an approximate estimate for work on the apartment
The average cost of construction work in the apartment
| Name of works | Unit rev. | Price, rubles | |
| 1. Floors | |||
| 1 | Removal of linoleum, carpet (without preservation) 1 layer | m² | 100 |
| 2 | Removal of hardboard, plywood (without preservation) 1 layer | m² | 90 |
| 3 | Dismantling of wooden / plastic skirting boards (without preservation) | p. m | 40 |
| 4 | Removal of parquet/laminate that is laid in a floating way (without preservation) | m² | 165 |
| 5 | Removal of parquet/laminate, which is laid on glue and nails (without saving) | m² | 215 |
| 6 | Dismantling the screed (up to 50 mm) | m² | 240 |
| 7 | Dismantling the screed (up to 100 mm) | m² | 300 |
| 8 | Dismantling the lag | m² | 120 |
| 9 | Dismantling of the wooden floor (without preservation) | m² | 275 |
| 10 | Dismantling tiles | m² | 120 |
| 11 | Removal of reinforced concrete plinth | p. m | 100 |
| 12 | Dismantling of floor granite slabs (without preservation) | m² | 360 |
| 13 | Jointing of seams in ceramics. tiles | m² | 100 |
| 14 | Installation of beacons on the floor | p. m | 70 |
| 15 | Backfilling of expanded clay under the screed | m² | 100 |
| 16 | Floor insulation with polystyrene foam | m² | 165 |
| 17 | Device cement-sand screed up to 50 mm | m² | 420 |
| 18 | Cement-sand screed device from 50 mm to 100 mm | m² | 650 |
| 19 | Reinforcement of the screed with metal mesh | m² | 60 |
| 20 | Self-levelling screed device | m² | 295 |
| 21 | Floor waterproofing device (mastic) | m² | 190 |
| 22 | Floor waterproofing device (roll) | m² | 290 |
| 23 | Priming of cement-sand screed with concrete contact | m² | 60 |
| 24 | Primer cement-sand screed acrylic primer | m² | 30 |
| 25 | Flooring and cutting plywood for glue | m² | 230 |
| 26 | Flooring and cutting plywood on bituminous mastic | m² | 240 |
| 27 | Sanding plywood | m² | 130 |
| 28 | Substrate flooring on a heat / sound / waterproofing basis | m² | 50 |
| 29 | Laying wooden logs | p. m | 100 |
| 30 | Laying commercial linoleum | m² | 300 |
| 31 | Seam welding in commercial linoleum | p. m | 60 |
| 32 | Linoleum laying | m² | 200 |
| 33 | carpet flooring | m² | 190 |
| 34 | Cork flooring installation | m² | 360 |
| 35 | Laminate flooring | m² | 350 |
| 36 | Scraping parquet | m² | 300 |
| 37 | Parquet putty | m² | 90 |
| 38 | Flooring parquet board floating way | m² | 400 |
| 39 | Parquet board flooring with glue | m² | 500 |
| 40 | Laying piece parquet (in a run, herringbone) | m² | 900 |
| 41 | Solid wood flooring in floating way | m² | 600 |
| 42 | Solid wood flooring on glue | m² | 700 |
| 43 | Adjustable floor device | m² | 500 |
| 44 | floor painting | m² | 160 |
| 45 | Floor varnishing | m² | 200 |
| 46 | Skirting board installation (wood or PVC) | p. m | 150 |
| 47 | Lacquering wooden skirting board | p. m | 50 |
| 48 | Ceramic laying. tiles standard size(20×30, 40) | m² | 840 |
| 49 | Ceramic laying. diagonal standard size tiles | m² | 900 |
| 50 | Ceramic laying. tiles less than (20×30, 40) | m² | 960 |
| 51 | Ceramic laying. tiles less than (20×30, 40) diagonally | m² | 990 |
| 52 | Porcelain stoneware masonry | m² | 1 500 |
| 53 | Laying mosaic tiles or complex patterns (price from) | m² | 1 300 |
| 54 | Grouting (mosaic) | m² | 250 |
| 55 | Grouting ceramics. tiles/porcelain tiles | m² | 180 |
| 56 | Washed down the tiles at 45 degrees | p. m | 495 |
| 57 | Ceramic step cladding. tiles | m² | 1 050 |
| 58 | Ceramic laying. border, plinth, ornament | p. m | 240 |
| 59 | Installation of a metal nut | p. m | 120 |
| 60 | floor cover | m² | 80 |
| 2. Walls | |||
| 61 | m² | 70 | |
| 62 | Cleaning walls from water-based paints | m² | 170 |
| 63 | Cleaning walls from non-aqueous paints | m² | 200 |
| 64 | Dismantling tiles | m² | 150 |
| 65 | Wall cleaning from putty | m² | 180 |
| 66 | Removing the ventilation grill | units | 100 |
| 67 | Dismantling of plaster | m² | 235 |
| 68 | Dismantling brick walls (1/2 bricks) | m² | 285 |
| 69 | Dismantling of brick walls (1 brick) | m² | 495 |
| 70 | Dismantling of partitions made of reinforced concrete, thicknesses up to 8 cm | m² | 2 420 |
| 71 | Dismantling of partitions made of reinforced concrete, thicknesses up to 16 cm | m² | 3 795 |
| 72 | Dismantling of walls from foam blocks, drywall, wood | m² | 350 |
| 73 | Dismantling of partitions from gypsum concrete | m² | 450 |
| 74 | Foam block walls | m² | 540 |
| 75 | Laying curvilinear partitions from foam blocks | m² | 740 |
| 76 | Brick walls (1/2 bricks) | m² | 665 |
| 77 | Masonry walls in brick | m² | 970 |
| 78 | Partition masonry complex shape brick | m² | 1 150 |
| 79 | Opening in a concrete wall | m² | 4 235 |
| 80 | Opening device brick wall(1/2 brick) | m² | 2 365 |
| 81 | Opening in a brick wall | m² | 3 025 |
| 82 | The device of the opening in the wall of foam blocks | m² | 1 540 |
| 83 | Wall waterproofing device (mastic) | m² | 190 |
| 84 | Installation of plasterboard partitions in 1 layer | m² | 540 |
| 85 | Installation of drywall partitions in 2 layers | m² | 670 |
| 86 | Sheathing of walls with plasterboard in 1 layer on a metal frame with installation of a shumanet | m² | 420 |
| 87 | Sheathing walls with drywall in 2 layers on a metal frame with the installation of a shumanet | m² | 490 |
| 88 | p. m | 550 | |
| 89 | Gluing joints with sickle | p. m | 45 |
| 90 | Wall cladding with clapboard on a frame | m² | 500 |
| 91 | Wall cladding with plastic panels on the frame | m² | 430 |
| 92 | Wall insulation with mineral slabs, foam plastic | m² | 150 |
| 93 | Wall soundproofing device | m² | 550 |
| 94 | Installation of a paint grid | m² | 90 |
| 95 | Wall gluing with fiberglass | m² | 150 |
| 96 | Priming walls with concrete contact | m² | 75 |
| 97 | Installation of plaster beacons | p. m | 80 |
| 98 | m² | 120 | |
| 99 | Plastering walls up to 20 mm | m² | 600 |
| 100 | Wall plastering from 20 mm to 50 mm | m² | 650 |
| 101 | Wall priming with acrylic primer 3 cycles | m² | 135 |
| 102 | Wall priming with acrylic primer 4 cycles | m² | 180 |
| 103 | Installation of paint corners | p. m | 60 |
| 104 | Wall plastering 1 cycle | m² | 295 |
| 105 | Wall plastering 2 cycles | m² | 450 |
| 106 | Wall sanding 1 cycle | m² | 70 |
| 107 | Wall sanding 2 cycles | m² | 140 |
| 108 | Wall gluing with fiberglass | m² | 230 |
| 109 | Finishing wall putty 1 cycle | m² | 210 |
| 110 | Finishing wall putty 2 cycles | m² | 350 |
| 111 | Wall painting (2 coats) | m² | 245 |
| 112 | Application of decorative plaster | m² | 1 100 |
| 113 | Wall gluing vinyl wallpaper without pattern selection | m² | 220 |
| 114 | Wall gluing with vinyl wallpaper with a selection of patterns | m² | 280 |
| 115 | Wall gluing with non-woven wallpaper without pattern selection | m² | 300 |
| 116 | Wall gluing with non-woven wallpaper with a selection of patterns | m² | 350 |
| 117 | Pasting walls with textile wallpaper | m² | 750 |
| 118 | Wall gluing linkrustoy | m² | 1 000 |
| 119 | wallpaper border pasting | p. m | 130 |
| 120 | Wall covering ceramic tiles one drawing 100×100 | m² | 970 |
| 121 | Wall cladding with ceramic tiles of the same pattern 200×200 | m² | 850 |
| 122 | Wall cladding with ceramic tiles of the same pattern 200×300 | m² | 825 |
| 123 | Ceramic wall cladding. tiles of the same pattern in different sizes | m² | 1 000 |
| 124 | Laying mosaics on the finished surface (price from) | m² | 1 300 |
| 125 | Laying tiles on the wall | m² | 1 500 |
| 126 | Washed down the tiles at 45 degrees | p. m | 495 |
| 127 | Installation of a ceramic border | p. m | 250 |
| 128 | Installation of decorative corners | l.m. | 100 |
| 129 | Decorative stone gluing | m² | 825 |
| 130 | Grouting (mosaic) | m² | 250 |
| 131 | Grouting ceramics. tiles | m² | 180 |
| 132 | Priming of slopes with concrete contact | p. m | 75 |
| 133 | Slope plastering | p. m | 540 |
| 134 | Slope priming 3 cycles | p. m | 120 |
| 135 | Slope priming 4 cycles | p. m | 160 |
| 136 | Slope putty | p. m | 300 |
| 137 | Slope grinding | p. m | 70 |
| 138 | Gluing slopes with fiberglass | p. m | 230 |
| 139 | Putty finishing slopes 2 cycles | p. m | 350 |
| 140 | Slope painting (2 layers) | p. m | 260 |
| 141 | Ventilation grill installation | units | 250 |
| 3. Ceilings | |||
| 142 | Removing old wallpaper 1st layer | m² | 90 |
| 143 | Cleaning the ceiling from water-based paints | m² | 190 |
| 144 | Ceiling cleaning from non-aqueous paints | m² | 310 |
| 145 | Ceiling plaster cleaning | m² | 190 |
| 146 | Cleaning the ceiling from foam tiles | m² | 250 |
| 147 | Dismantling rack ceiling in the bathroom | m² | 250 |
| 148 | Dismantling moldings and ceiling cornices | p. m | 250 |
| 149 | Dismantling PVC ceiling cornices | p. m | 150 |
| 150 | Dismantling of plaster | m² | 240 |
| 151 | Dismantling the ceiling from the plasterboard in 1 level | m² | 140 |
| 152 | Dismantling the ceiling from the plasterboard in 2 levels | m² | 210 |
| 153 | Jointing and repair of cracks | p. m | 120 |
| 154 | Ceiling waterproofing device (mastic) | m² | 250 |
| 155 | Drywall box installation | p. m | 750 |
| 156 | Device false ceiling from GKL in one layer | m² | 445 |
| 157 | False ceiling device in two layers of plasterboard | m² | 550 |
| 158 | Installation of a multi-level ceiling from GKL | m² | 660 |
| 159 | The device is a 2-level ceiling with a complex geometry. forms | m² | 750 |
| 160 | 2-level ceiling device with built-in interior lighting | m² | 825 |
| 161 | The device 2 levels of the ceiling is a simple geometer. forms | m² | 660 |
| 162 | Gluing joints with sickle | l.m. | 45 |
| 163 | The device of a mirror suspended ceiling from 10 m². | m² | 725 |
| 164 | Slatted ceiling in the bathroom | m² | 880 |
| 165 | False ceiling device type "Armstrong" | m² | 250 |
| 166 | Ceiling insulation with mineral slabs, foam plastic | m² | 200 |
| 167 | Ceiling lining with clapboard on the frame | m² | 545 |
| 168 | Ceiling cladding with plastic panels on the frame | m² | 460 |
| 169 | Installing a turnkey stretch ceiling (price from) | m² | 650 |
| 170 | Installation of plaster beacons | p. m | 95 |
| 171 | Metal reinforcing mesh device | m² | 110 |
| 172 | Ceiling primer with concrete contact | m² | 75 |
| 173 | Ceiling plastering up to 20 mm | m² | 630 |
| 174 | Ceiling plastering from 20 mm to 50 mm | m² | 670 |
| 175 | Ceiling primer with acrylic primer 3 cycles | m² | 135 |
| 176 | Ceiling primer with acrylic primer 4 cycles | m² | 180 |
| 177 | Installation of paint corners | p. m | 75 |
| 178 | Putty ceiling 1 cycle | m² | 360 |
| 179 | Ceiling putty 2 cycles | m² | 500 |
| 180 | Ceiling grinding 1 cycle | m² | 90 |
| 181 | Ceiling grinding 2 cycles | m² | 180 |
| 182 | Gluing the ceiling with fiberglass | m² | 280 |
| 183 | Ceiling putty finishing 2 cycles | m² | 380 |
| 184 | Puttying, grinding of curved ceiling elements | p. m | 620 |
| 185 | Bonding of curvilinear ceiling elements with fiberglass | p. m | 250 |
| 186 | Ceiling painting (2 layers) | m² | 280 |
| 187 | Ceiling gluing with vinyl wallpaper without pattern selection | m² | 280 |
| 188 | Painting the ceiling with wallpaper | m² | 300 |
| 189 | Sticking the ceiling with vinyl wallpaper with a selection of patterns | m² | 360 |
| 190 | Gluing the ceiling with non-woven wallpaper without selecting a pattern | m² | 370 |
| 191 | Gluing the ceiling with non-woven wallpaper with a selection of patterns | m² | 420 |
| 192 | Ceiling gluing with textile wallpaper | m² | 900 |
| 193 | Installation, stretching and puttying of plaster moldings around the perimeter (price from) | p. m | 500 |
| 194 | Installation, puttying of polyurethane foam ceiling cornices | p. m | 290 |
| 195 | Painting polyurethane foam ceiling cornices 2 cycles | p. m | 100 |
| 4. Electrical work | |||
| 196 | Dismantling of electrical wiring | p. m | 40 |
| 197 | Dismantling spotlights, sockets, switches | units | 60 |
| 198 | Plug sockets, switches | units | 170 |
| 199 | Chandelier dismantling (price from) | units | 150 |
| 200 | Dismantling the power shield | units | 420 |
| 201 | Chasing concrete for electrical wiring 20x40 mm | p. m | 240 |
| 202 | Chasing bricks for electrical wiring 20x40 mm | p. m | 180 |
| 203 | Chasing gypsum for electrical wiring 20x40 mm | p. m | 120 |
| 204 | strobe | p. m | 170 |
| 205 | Holes in concrete 25 mm | units | 240 |
| 206 | Holes in brick 25 mm | units | 120 |
| 207 | Laying power cable up to 6 mm² | p. m | 90 |
| 208 | Laying a low-voltage cable | p. m | 45 |
| 209 | Junction box installation | units | 180 |
| 210 | Installing a transformer (12V) | units | 240 |
| 211 | Installation of trays | p. m | 320 |
| 212 | Installation of an electrical box with a cross section of up to 50x50 mm | p. m | 100 |
| 213 | Installation of an electrical box with a cross section of up to 200x50 mm | p. m | 200 |
| 214 | Installation of an internal shield for 24 modules (concrete) | units | 4 235 |
| 215 | Installing the internal shield for 24 modules (brick) | units | 3 025 |
| 216 | Installation of a low-current shield | units | 1 210 |
| 217 | Power shield assembly (price from) | units | 5 000 |
| 218 | Installing the outer shield | units | 1 815 |
| 219 | Laying heating element underfloor heating | m² | 800 |
| 220 | Connection and installation of a rheostat for underfloor heating | units | 400 |
| 221 | Installation of socket boxes in concrete | units | 230 |
| 222 | Installation of socket boxes in brick, plaster | units | 180 |
| 223 | Installing an electrical outlet, switch | units | 380 |
| 224 | Call setting | units | 350 |
| 225 | Video intercom installation | units | 550 |
| 226 | Connecting an electric towel warmer | units | 1 870 |
| 227 | Connecting and installing the fan | units | 485 |
| 228 | Installation of spotlights | units | 370 |
| 229 | Sconce installation | units | 450 |
| 230 | Ceiling light installation | units | 550 |
| 231 | Installing a hook for a chandelier / lamp | units | 180 |
| 232 | Installation of a chandelier 3-horn diameter up to 50 cm | units | 500 |
| 233 | Installation of a chandelier 3-horn diameter from 50 cm | units | 700 |
| 234 | Chandelier installation 5-horn diameter up to 50 cm | units | 650 |
| 235 | Installation of a chandelier 5-horn diameter from 50 cm | units | 850 |
| 5. Plumbing work | |||
| 236 | Dismantling of PVC pipes | p. m | 130 |
| 237 | Dismantling of cast iron pipes | p. m | 150 |
| 238 | Dismantling of water supply pipes | p. m | 130 |
| 239 | Dismantling the bath | units | 1 700 |
| 240 | Dismantling the kitchen sink | units | 420 |
| 241 | Dismantling the sink | units | 620 |
| 242 | Dismantling the heated towel rail | units | 480 |
| 243 | Dismantling the washing machine | units | 300 |
| 244 | Dismantling "moydodyr" | units | 330 |
| 245 | Dismantling the shower cabin | units | 900 |
| 246 | Dismantling the toilet bowl, bidet | units | 550 |
| 247 | Dismantling the radiator | units | 330 |
| 248 | Dismantling the mixer | units | 190 |
| 249 | Dismantling the tap, filter, reducer | units | 165 |
| 250 | Chasing bricks for communications 50x70 | p. m | 650 |
| 251 | Chasing concrete under communications 50x70 | p. m | 1 400 |
| 252 | strobe | p. m | 170 |
| 253 | Laying PVC sewer pipes | p. m | 210 |
| 254 | Laying pipes from metal-plastic with a diameter of up to 32 mm | p. m | 290 |
| 255 | Polypropylene pipe laying | p. m | 230 |
| 256 | Copper pipe laying | p. m | 400 |
| 257 | Connection of copper pipes by soldering | PCS. | 600 |
| 258 | Installation of fittings made of copper (corner, tee, cross, coupling, etc.) | PCS. | 350 |
| 259 | Comb installation | units | 960 |
| 260 | Installing a filter, reducer | units | 960 |
| 261 | Bathtub installation cast iron/steel/acrylic | units | 2 200 |
| 262 | Installation of a shower cabin with connection | units | 5 445 |
| 263 | Installation of “moidodyr” | units | 1 650 |
| 264 | Installation of a sink, tulip | units | 1 450 |
| 265 | Shower rail installation | units | 400 |
| 266 | Installing the installation | units | 2 420 |
| 267 | Installing a toilet or bidet | units | 2 145 |
| 268 | Installing a heating radiator in a regular place | units | 650 |
| 269 | Installing a new heating radiator | units | 3 000 |
| 270 | Installation of a heating radiator with a recut into the riser | units | 5 445 |
| 271 | Installing a heated towel rail | units | 2 500 |
| 272 | Installing a storage water heater | units | 2 300 |
| 273 | Installation of a flow water heater | units | 1 650 |
| 274 | Installing accessories | units | 250 |
| 275 | Washing machine connection | units | 1 400 |
| 276 | Painting heating pipes 2 cycles | p. m | 70 |
| 6. Carpentry work | |||
| 277 | Removing the door leaf | units | 100 |
| 278 | Dismantling door block | units | 275 |
| 279 | Installation of a swing door block | units | 1 900 |
| 280 | Installation hinged door with tie-in hinges, locks with installation door frame, with platbands and extras | set | 3 000 |
| 281 | Platband installation | set | 990 |
| 282 | Installation of extensions | set | 1 100 |
| 283 | Installation of a sliding door block | units | 2 100 |
| 284 | Installation of a double-leaf sliding door block | units | 2 700 |
| 285 | Installation of a double-leaf swing door | units | 2 200 |
| 286 | sidebar door hinges, locks with handles | set | 600 |
| 287 | Window painting | m² | 360 |
| 288 | Door painting | m² | 420 |
| 7. Shipping costs | |||
| 289 | Removal of bags of construction debris | units | 80 |
| 290 | Removal of bags of construction debris (floors without elevator) | units floor | 40 |
| 291 | Skid building materials | t | 1 500 |
| 292 | Bringing building materials (floors without lift) | t floor | 750 |
| 293 | Removal of construction waste in containers 8 m3 (with a weight of cargo in a container up to 5 tons) | cont. | 6 000 |
| 294 | Removal of construction waste in containers 20 m3 (with a weight of cargo in a container up to 15 tons) | cont. | 14 000 |
| 295 | Removal of construction debris in containers 27m3 (with a weight of cargo in a container up to 26 tons) | cont. | 18 000 |
| 296 | Removal of construction waste in containers 32 m3 (with a weight of cargo in a container up to 26 tons) | cont. | 20 000 |
| 297 | Delivery of building materials | t | 1 700 |
Have you bought a new home or do you already have an existing home in need of renovation? Each of us knows that repair is a useful, but very lengthy procedure. It must be approached responsibly and conscientiously. Yes, and it’s definitely impossible to rush in this matter, because any defect can lead to irreversible consequences, which can, after a while, force you to carry out repairs again. But you want the repair to go quickly, efficiently and painlessly. Everything will be so only if you take the time and approach this issue with all seriousness, select the desired design and carefully make all the calculations.
Do-it-yourself repair private house
Where to begin do-it-yourself repair a private house ? First of all, you need to decide what kind of repair your home needs. And this can be determined only after a qualitative inspection of the premises.
As for private houses, it is imperative to look at the foundation of the premises at the very beginning. After all, the fate of your future home depends on its condition. At the slightest damage, you need to do-it-yourself house foundation repair. This may be a surface reinforcement of the foundation, or it may require a complete replacement. It all depends on his condition. The cost will depend on the type of work. Only after the foundation has been inspected and brought into proper condition, you can proceed to other types of work.

If you are interested in the question: “?”, Then carefully read our article, in which we will reveal the sequence of work in a private house. After repairing the foundation, you need to carefully inspect the walls and roof of your private house. If the walls and roof leak, all internal repairs will be in vain, the wallpaper may fall behind, stains will remain on the walls or ceiling. And these are only the best variations of the consequences after the building gets wet. If necessary, you need to strengthen the walls and replace the tiles.

Private houses are usually colder than apartments in high-rise buildings. Therefore, you can not do without additional insulation of the building. First of all, it is necessary. Insulation in this case, not only will not let the cold into the house, but will also serve as an additional reinforcement. As we know, the roof of any house is subject to the greatest load and, accordingly, the greatest impact from the environment, therefore it is through the roof that the most cold air enters the house. This suggests that the ceiling and roof need insulation the most.

In addition to roof insulation, you will need and. In private houses and apartments on the first floor, moisture and cold come out from the ground and foundation. It will be very cold to walk on such a floor, and in the cold season a feeling of dampness may also appear. And after all, a wide variety of diseases can appear from frozen feet. Therefore, you should not delay with floor insulation, especially if small children live in the house, who love to crawl and lie on the floor.

You shouldn't give up either. Warming can be carried out both from the inside and from the outside. It is very difficult to judge which option is better. The only plus in the direction of external insulation is that it is carried out from the outside of the building and, accordingly, does not eat up the useful area of \u200b\u200bthe house. Therefore, it is better to focus on insulation from the outside of the building, especially if your house is not large. In this case square meters better save.
With the general repair of the house, the issue is resolved, everything internal views work done, now you can safely do it do-it-yourself home renovation from within. The issue of repair is not easy, especially when a lot of effort, time and material resources have already been spent on the previous stages. But, most often, internal repairs are indispensable. How to start building renovations?
First you need to decide what type of repair you need: major or cosmetic? From the choice of the type of repair will be not only the total cost of the work, but also the time for their implementation. Cosmetic repairs are much simpler in terms of type and quantity. necessary work and therefore cheaper. This type of repair is a complete replacement of the interior decoration. That is, the old wallpaper, paint and other things are removed, the walls are plastered, prepared for a new finish. At the next stage, new wallpapers are glued, walls are painted, tiles are glued, and so on. If necessary, the flooring can also be replaced.

In the case of a major overhaul, everything is much more complicated. Here, it may already be necessary to replace the electrical wiring, air conditioning and ventilation systems, as well as sewage. Agree, the task is not easy, and even quite expensive. In addition, it will take a lot of time and nerves to replace all the equipment for normal life. Therefore, thinking about a major overhaul, immediately set yourself up for a lot of problems. Unfortunately, they cannot be avoided. Therefore, if you are just about to purchase a new home for your family, carefully review the condition of the house. Believe me, if the wallpaper peeled off the walls - it's not so scary than if the sewerage system in the house has worn out over time.
Starting to repair, almost each of us tries to save money. But, as they say: a miser pays twice. This applies to several stages of repair, on which it is definitely not worth saving. In some cases, savings will not affect the condition of the house and interior decoration, while in others it will result in irreversible consequences. So what is not worth saving when doing repairs?

Let's start with the fact that you do not need to save on the main building materials, which are the main responsibility. Among such materials, it is worth noting paint, putty, plaster and primer. Agree, it’s much easier to replace the wallpaper than to do a complete interior decoration if the plaster or putty starts to peel off? Therefore, we suggest that you better save on wallpaper by choosing not too expensive models. Wallpapers simpler and cheaper do not always last less or do not look so bright. If there is a taste, then it is possible to perform interior decoration with fairly cheap wallpaper, which will look an order of magnitude better than decorating the room with expensive and better wallpaper.

It is extremely important to purchase only expensive and high-quality plumbing items, which include pipes and all possible connections. This is especially true for those who are going to hide the pipes inside the walls. In the event that from high pressure and a pipe of poor quality will burst, you will have to break the wall to find the problem, fix it, and then re-do the finishing work. But you can immediately choose high-quality pipes, the condition of which you can not worry about for a long time.
Wiring is also not a component of the house that could be saved on. Many people often use aluminum wires as wiring. But in fact, they are not so high quality and durable. Considered much better copper wires however, they are much more expensive. But, it's definitely not worth saving on them. In addition to wires, it does not hurt to purchase good quality protective devices, protecting the building from voltage surges, as well as on the number of machines installed in the switchboard.

Do-it-yourself home repair video includes not only repair work of the foundation, roof, walls, replacement of wiring and pipes, as well as strengthening of floors. Repair is also a quality interior decoration premises, which is assigned no less important task than the building itself. Your home should bring you the pleasure of staying in it, give positive emotions and cheer you up. Having once spent a lot of money and time on repairs, you should not remember about it for many more years.
The interior space of the house should be cozy and comfortable for the household. Each room should be decorated in accordance with the purpose of the room, the location and wishes of the one who will constantly be in it. Design options have become even more recent. Modern styles so many that it is very difficult to single out among them the one that is most suitable for decorating the rooms of a private house. Each is good in its own way, has its own advantages and disadvantages. Therefore, you should choose only according to your personal considerations and preferences. If you are more attracted home comfort, warmth and comfort, then you should opt for a classic or country style. These two directions will bring to the atmosphere of the room all those components that you have long dreamed of. The classic has been loved by everyone for more than one century, and will remain popular for the same period. Therefore, choosing classic style, you definitely won't go wrong.

Country also attracts with its cute, homely atmosphere. Many attribute this style to the countryside. The thing is that Country includes many handmade elements in its design, including a variety of blankets, chair covers, candles, vases and so on. And all this is done by hand. The interior is dominated by a lot of textiles in warm colors, soft toys and a lot of decor. Agree, such an interior will look very cute and comfortable.

In recent years, styles such as Minimalism and Modern have gained particular popularity. Of course, they are very fashionable and ultra-modern, but at the same time they cannot be called cute and homely. The fact is that they are quite strict, there is practically no decor here, everything is stylish, strict and concise.
Do-it-yourself house repair photo- the task is not an easy one and you need to approach it in good faith so as not to make mistakes and not to perform the same work several times.

But repair wooden house do it yourself a little more difficult than brick, but if you try, then there will be no problems. Never rush and then you will be able to equip a warm and cozy nest for yourself and your family. All your efforts will always pay off. The main thing is to take into account all our recommendations, to make repairs in good faith. And if there are no special skills in performing repairs, and even more so, complex work, it is better to seek help from specialists than to do it yourself, but not correctly.
Capital repairs in the apartment consists of a number of stages. The sequence of these steps is very important. Otherwise, some of the work already done will have to be redone, which will lead to a delay in the repair time and an increase in its cost. The article shows where to start a major overhaul in an apartment. And also, what sequence of actions will need to be followed during a major overhaul. These recommendations will help to avoid repeated and unnecessary calls of the masters to the object, and, accordingly, damage to the volumes already made. Where to start apartment renovation?
The initial stage of the overhaul
At the initial stage, repairs in the apartment, it is necessary to start with the preparation of a repair project. It should consist of:
- planning received after repair;
- plan for the placement of communications (sewerage, water supply, electrical wiring);
- layout of technological equipment (bath, toilet, washbasin, water meters, air conditioning, built-in furniture).

Repair in the apartment.
This is not a renovation project. This is an interior design project.
Without a project, you can easily run into a situation where the washbasin cannot be placed due to the riser, sewn up with a box. And there is no electricity connected to the lamp by the mirror. The cost of correcting such errors is very often many times higher than the cost of the project. Do not save on the project - on the contrary, it will save you money. A prerequisite its compilation are fresh measurements directly on the object. You should not blindly trust the dimensions indicated in the passport for the apartment.

The main thing in the repair project is the thoughtful placement of the required technological elements and the convenience of using the apartment after the repair.
The next stage is the approval of the project by the Customer with the direct participation of the contractor. The customer hardly understands the intricacies of the use of building materials, as well as the technology of their installation. Therefore, the approved project should suit the master. In it, in addition to the above, the types of materials used for finishing should be determined.
After the approval of the drawings before the start of repairs in the apartment, temporary networks are installed - water, sewerage, electricity. During the overhaul of the apartment, everything changes - from wiring to flooring. At the same time, it is simply impossible to carry out repairs in an apartment without water, sewerage and electricity.
Disposable tool for thorough repairs in the apartment:
A disposable repair tool means a consumable that we need. It:
- roulette
- plumb line
- level
- spatulas
- brushes
- rollers
- spray guns
- vise
- files
- masking tape
- skin (various grains)
- glue gun
- paint bath for various mixtures, primers, cements, paints, etc.
Very often, repair teams do not include them in the cost of work and require them from the Customer. For the latter, this is often news.
This is followed by the purchase of consumable equipment - garbage bags, brooms, scoops, dust bags for a vacuum cleaner, etc.
Dismantling works (repair in the apartment)
Dismantling works are the most noisy and wasteful stage of capital repairs of apartments. All finishing layers on the main walls are removed. All unnecessary and non-bearing partitions are demolished (if redevelopment of the apartment is envisaged). The configuration changes doorways(their location, size). As well as covering the floor and replaceable structures, fencing balconies and loggias.
Before starting the dismantling, it is advisable to talk with the neighbors. Warn them about the noise, assure them of the shortest possible time for such inconveniences. In the end, they will agree at what time you will do repairs in the apartment so as not to particularly disturb the neighbors.
Decide in advance how the waste will be disposed of. From a standard "kopeck piece" you can easily get several trucks (depending on the amount of dismantling and the capacity of the cars). Waste storage at the entrance, including temporary, can lead to conflict with neighbors.

The amount of garbage during the repair of an apartment is often very surprising for the customer.
Garbage removal can never be done once. As the work progresses, it will periodically be necessary to remove the remaining materials, packaging, etc. It is better to discuss the total expected number of machine-walkers with the contractor in advance.
Customers usually greatly underestimate the volume, and hence the cost, of a number of works. Feel free to discuss in detail your financial costs in advance with the contractor. So it will be easier for you to control it, and the performer, in turn, will be sure that he will receive the appropriate payment.
Basic installation
Door and window openings
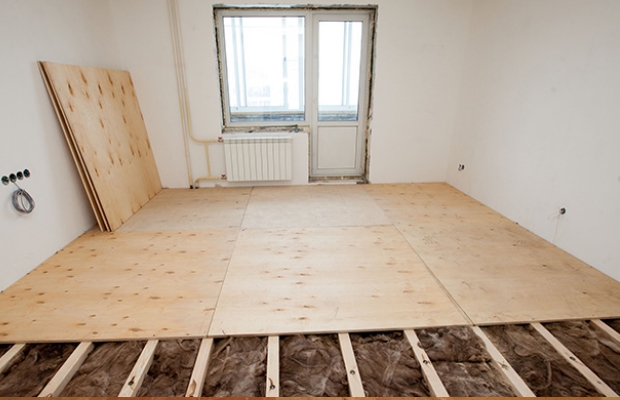
Floor preparation
Finishing installation
At the stage of finishing installation during the repair of an apartment, false walls are often equipped to hide heating radiators and install secret sliding doors (if necessary).

Sewing of heating radiators
Sewing a heating radiator allows you to hide the pipes and the radiator itself (which is especially true if it is old). And also, it helps to avoid practically unsolvable difficulties in finishing the room in the area of the junction of the risers with the floor and ceiling.
Communications sheathing
In the same period, communication boxes are mounted. Not a single repair of a bathroom in an apartment building can do without this operation.

Plasterboard box - a solution that has become standard.
After drywall works priming, installation of corners, puttying is carried out.

All surfaces sewn up with drywall are subject to puttying.
ceilings
After all the surfaces are formed, you need to call the measurer for stretch ceilings (if the ceilings are just stretch ceilings). At the same time, the finishing of the loggia or balcony, the installation of junction points, the laying of tiles in the bathroom, in the kitchen, and the installation of the bathroom are carried out.
The final leveling of the floor, especially during major repairs, is highly desirable. This is explained by the fact that when performing a large amount of work on the floor, various damage to the surface layer will inevitably appear. Therefore, it is hardly possible to save a new screed from this. It is more convenient to underfill the main screed by 1 cm in height, and at the end of all the “heavy” work, make the finishing layer “self-flowing”.
Wall finishing
After finishing work on the floor, you can proceed to the last types of finishing work. It includes the final priming and finishing of the walls (wallpaper or painting), installation stretch ceilings and laying flooring (laminate, linoleum, etc.). After that, it remains only to install interior doors. Then arrange arches and portals (if any).
The final stage of apartment renovation
Our renovation is almost complete. To complete it you will need:
- installation of kitchen and all built-in furniture,
- installation of skirting boards
- fine electrics and indoor units of air conditioners.
In parallel with this, we carry out the installation of fine plumbing (washbasin, toilet bowl). Then comes the cleanup.
The final touch is the installation of curtains, blinds, shelves, mirrors and furniture installation.
We hope that this article will help you understand where to start overhauling an apartment and what sequence of actions you should follow in the future.